(Naturally, you need to replace the Python version number to match your own configuration.)
You can check and, if needed, add the folders as follows:
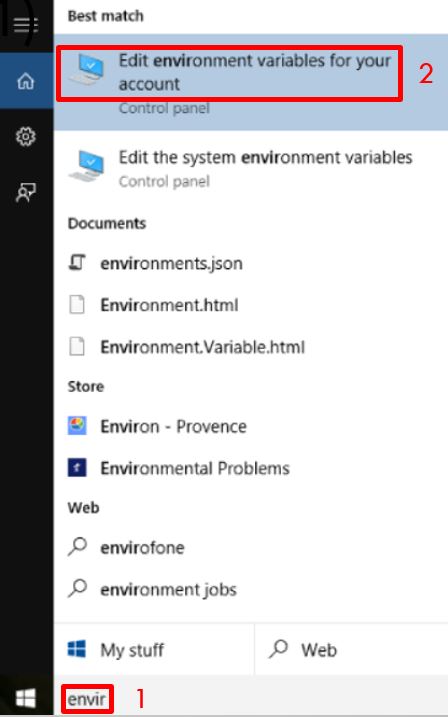
1. On your Windows system, search for 'envir' (or 'variab' on many non-English systems).
2. Click 'Edit environment variables for your account' (rather than 'Edit the system environment variables').
(See the Source of this image. All other screen shots, images, etc. are my own.)
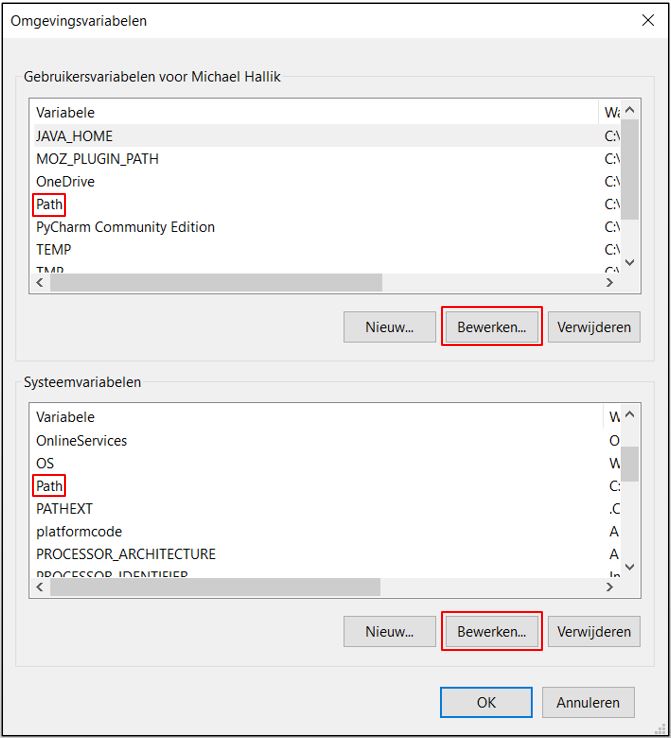
3. Locate and then edit the 'path' variable in either the system variables or the user variables (see here for the difference).
If you don't have such a variable, create one first, using the 'New' button.
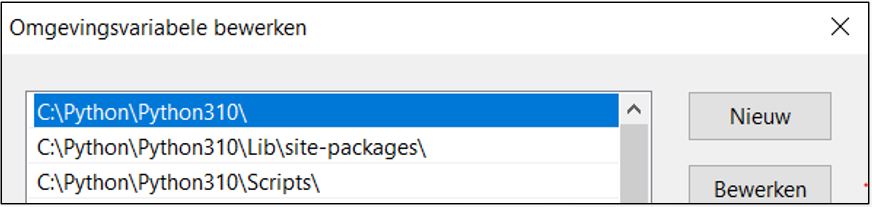
4. Add at least the two required paths (as mentioned above) as values to the PATH variable (but preferably all three.
5. Apply and close all dialogs.
6. The new values will only be available in command line windows that are opened from now on. Existing, already opened windows will not yet know the new values of the PATH variable.
Now repeat step 2 (but in a new, freshly opened command line window).
If you still get the same (or a different) error message, you're gonna have to apply some Google-fu.
I won’t go into the questions of what a virtual environment is and what the advantages are of using one. Please see this earlier post to read more about Python virtual environments.
Here, we’ll simply create a virtual environment. We will employ it later in our RF projects, by binding that environment to the Robot Framework language server extension.
To create a Python virtual environments we will need a suitable tool.
Here, we will use virtualenvwrapper-win.
See the relevant section of yet another post for some background information on this particular tool and about virtualenv itself (which is being reused by virtualenvwrapper-win).
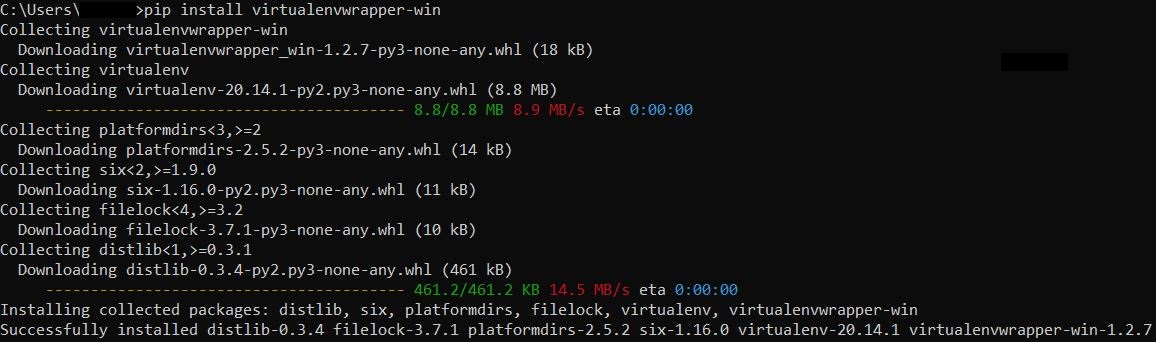
To install the tool, execute the following command:
pip install virtualenvwrapper-win
This should result in something like this:
Installing virtualenvwrapper-win on the command line.
Note 1: read another article's section on pip if you want to know more about it.
Note 2: if you receive an error message stating that pip cannot be found, please consult this troubleshooting section of the same article.
We will use the mkvirtualenv command to create a virtual Python environment named ‘robotframework’.
mkvirtualenv robotframework
If, by any chance, you have multiple Python versions installed on your system, you will need to use the -p switch to specify the Python version that you’d like the virtual environment to be based on:
mkvirtualenv -p 3.10 robotframework
If you have multiple Python versions, but omit the -p switch, then virtualenv will use the Python version that is the first (going top down) on your PATH (see above).
As mentioned, ‘robotframework’ will be the name of our virtual environment. Naturally, in a real-life context (especially when multiple virtual environments are in use) you’d probably use a more descriptive, meaningful name.
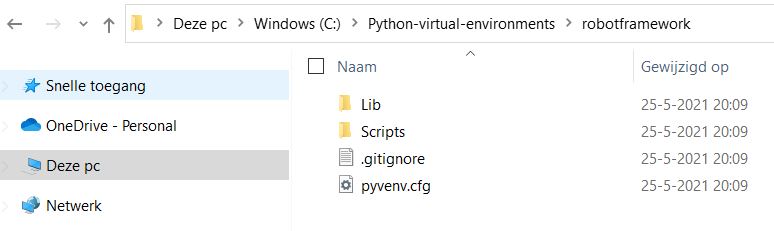
Running the appropriate mkvirtualenv command will create a virtual environment in our WORK_HOME target folder:
A successfully executed mkvirtualenv command.
The prefix (robotframework) on the command line indicates that the environment has not only been created, but has also been activated as well. If you want to know more about this (or about the mkvirtualenv command in particular), please see the first two sections of this earlier post.
The mkvirtualenv command will create a folder structure in our WORKKON_HOME folder.
Our virtual Python environment has been created in the form of a folder structure.
The root folder of this structure is named ‘robotframework’, since that is the name that we gave to our virtual env.
If you want to learn more about this folder structure, please read the relevant section of this article.
For now, we can exit the command line and move on to the next step.
We are now ready for the installation of Robot Framework and required test libraries.
Let’s start with the former.
First we need to activate the virtual environment that we want to use in our future RF projects (and that we will therefore have to bind to the RF VSC extension later on). By activating that environment on the command line, our stack will not be installed globally, but only for (i.e. within) the relevant virtual environment.
Therefore we will use the virtualenvwrapper-win workon command to activate the environment and subsequently use the pip install command to install RF into the activated env.
Activate our virt env and install Robot Framework into it.
To install test libraries, such as the BrowserLibrary or SoapLibrary, you can also use pip install. Here we will do so, but in combination with using a requirements file (click the image to download it):
Contents of the requirements file.
Click the image to download the plain text requirements file.
This is an example file. Please make sure to delete all lines that install packages that you are not interested in (and/or add lines for other packages).
On the command line, make sure that our environment is activated and issue the command:
pip install -r requirements.txt
Like this:
Activate the virtual env and initiate the installation.
Of course, you may have to specify the path to the file, e.g.:
pip install -r C:\Tmp\requirements.txt
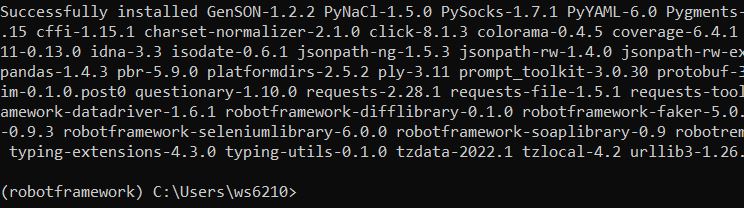
This will install all packages that are specified in the requirements file.
Depending on the content of the requirements file, the packages will be collected and installed. A successful installation process.
If you want more details, please see this section on the -r switch.
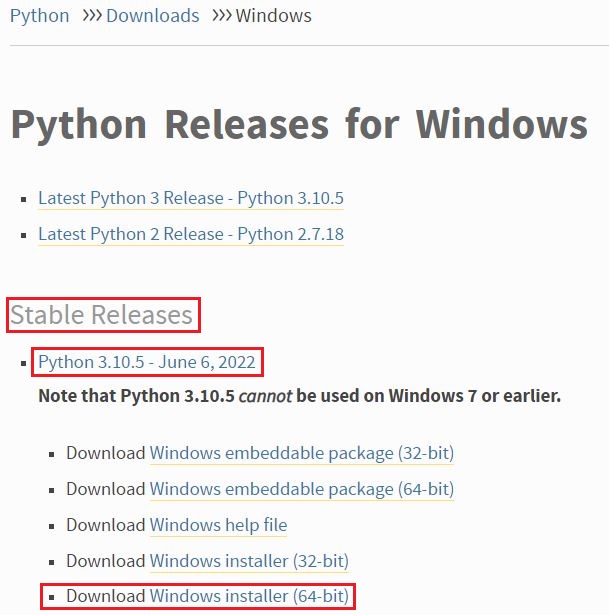
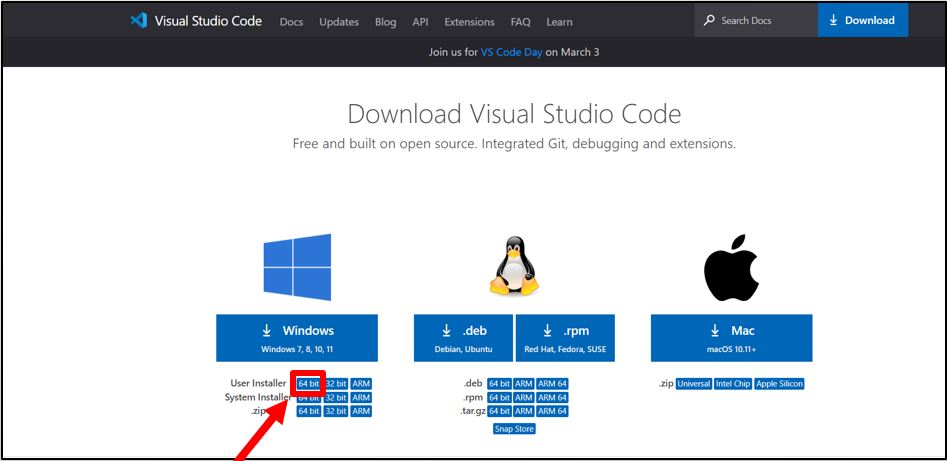
Go to the VCS download page and download the relevant Windows installer:
Download the installer.
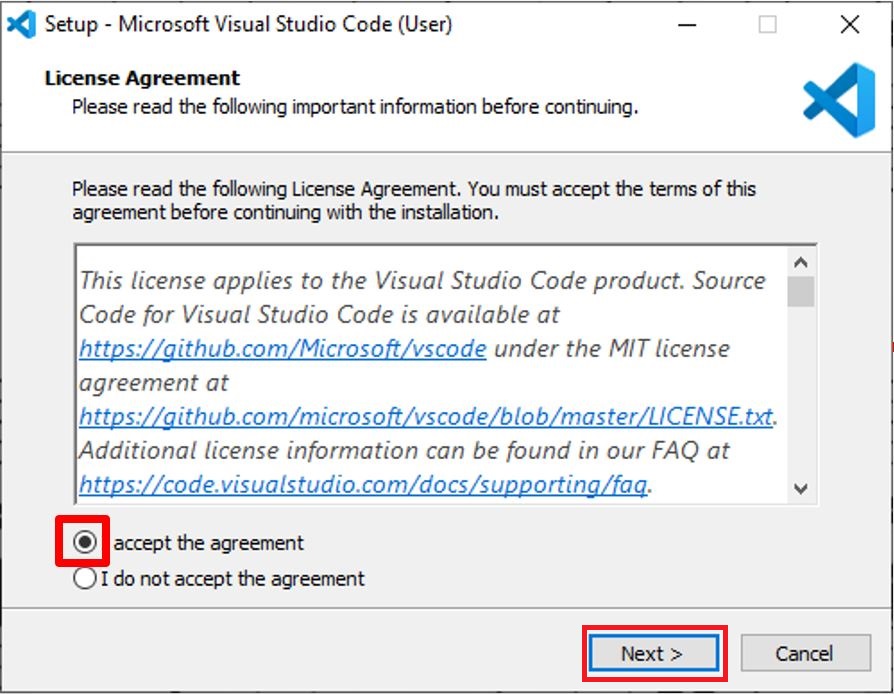
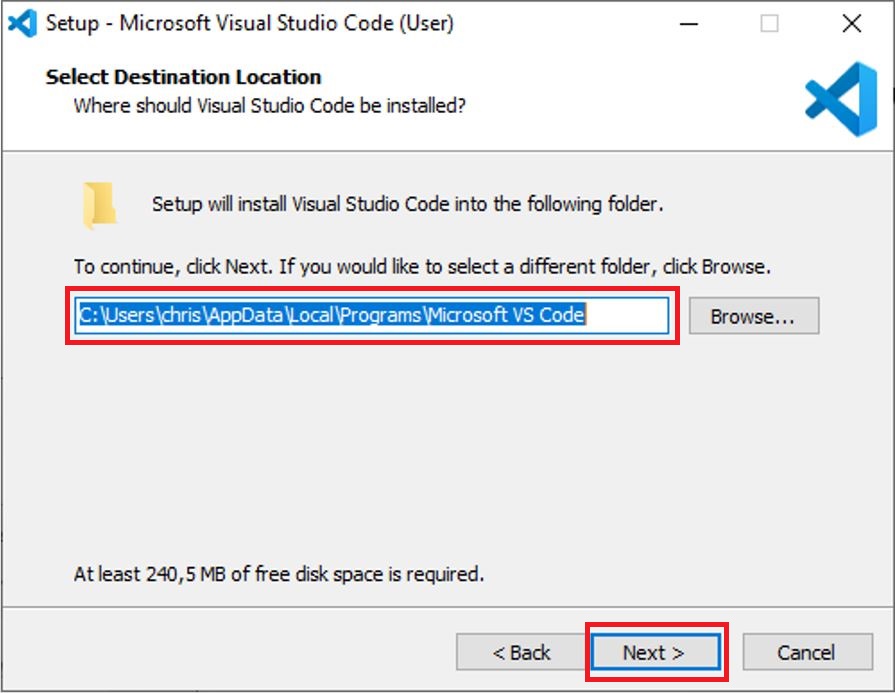
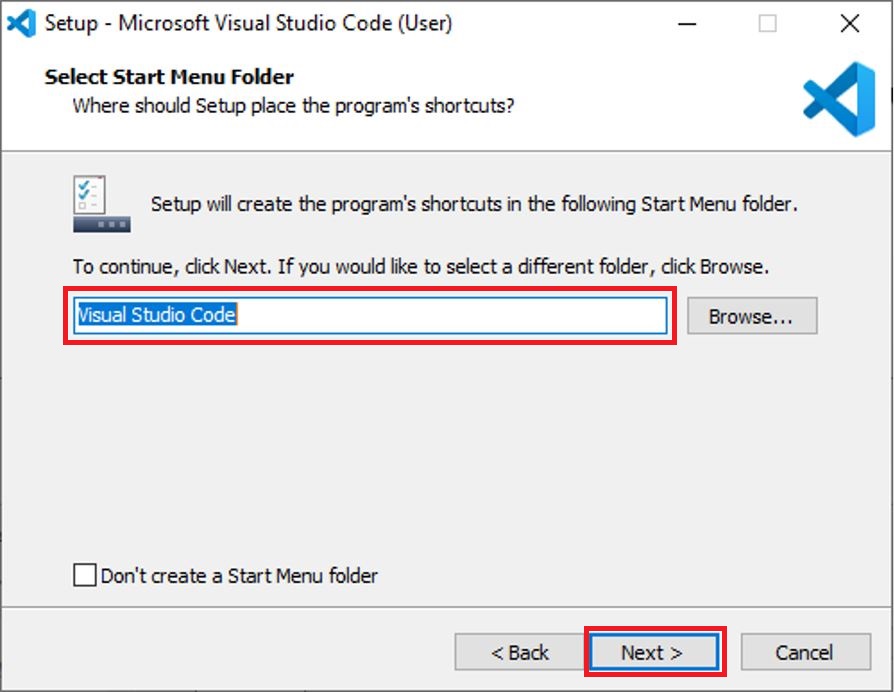
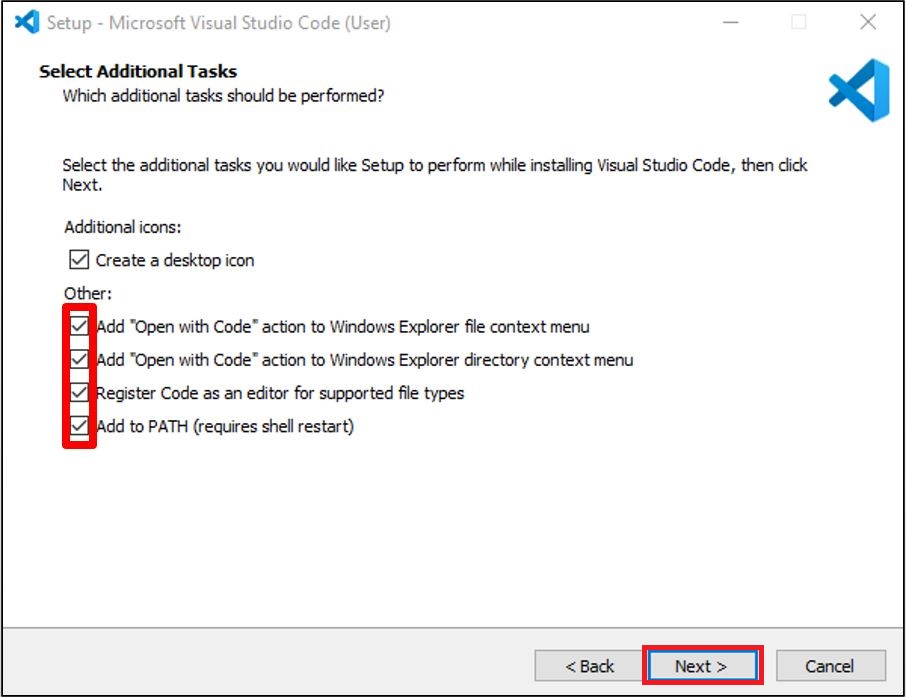
Now follow these steps (click an image to enlarge):
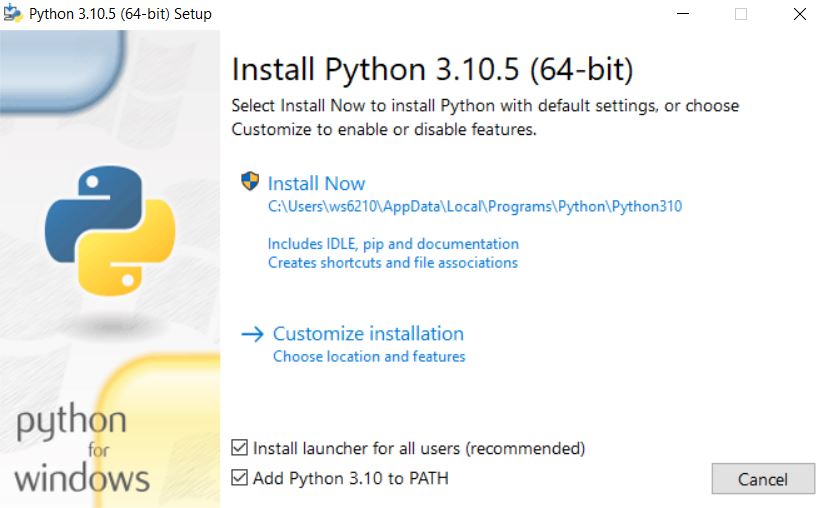
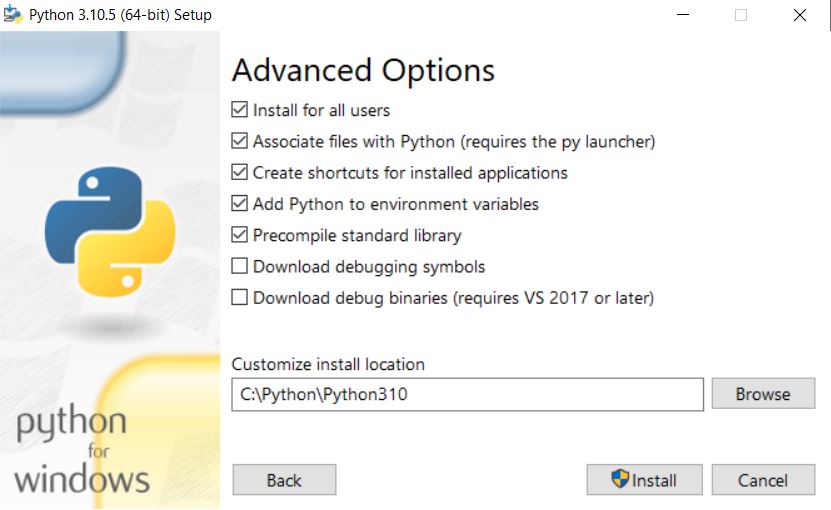
Start the installer, select a language and click the 'OK' button.
Accept the agreement and click the 'Next' button.
Select a folder and click the 'Next' button.
Create a start menu item (or not) and click the 'Next' button.
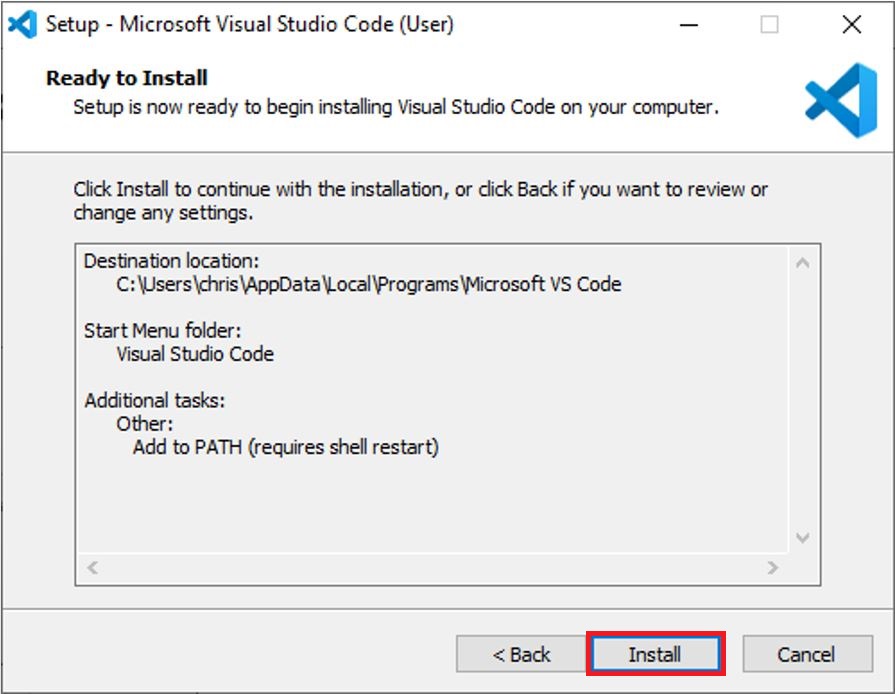
Red square: recommended installer settings. Click the 'Next' button.
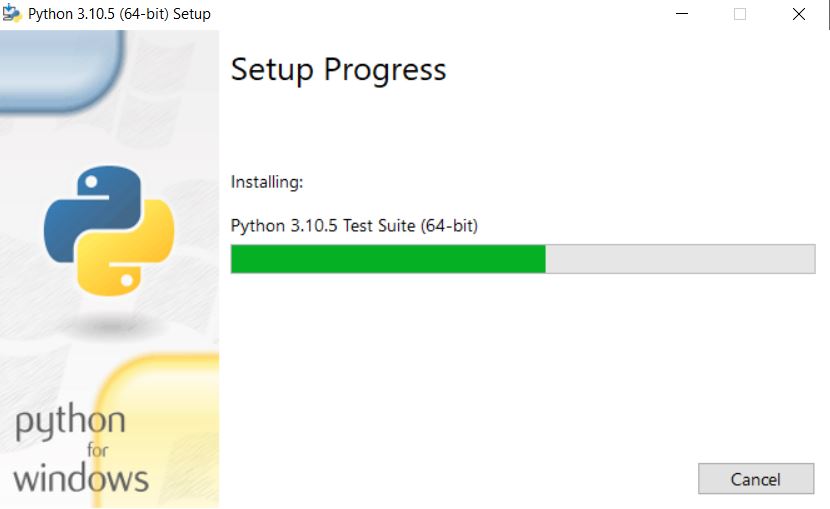
Now click the 'Install' button to start the actual installation.
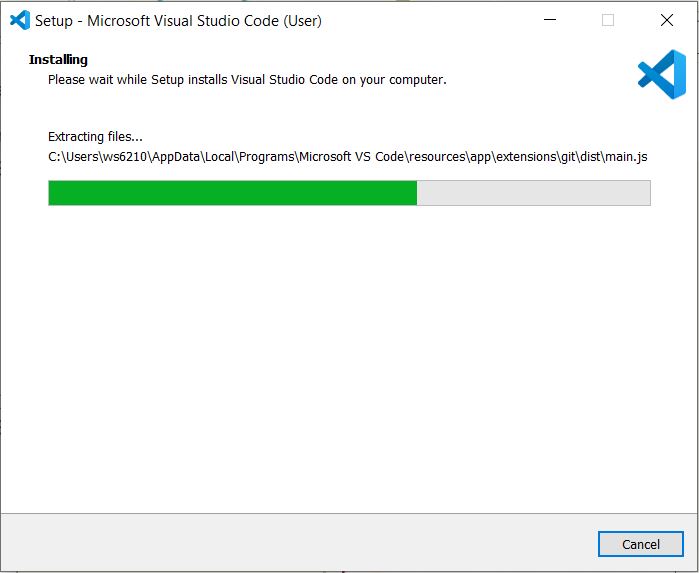
Installation in progress.
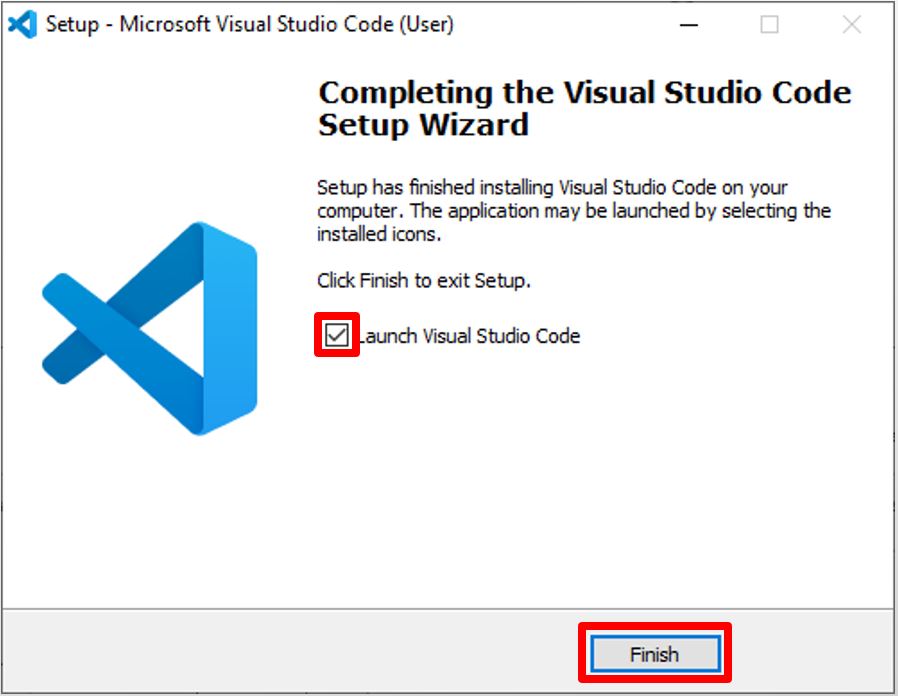
Click the 'Launch Visual Studio Code' check box and then the 'Finish' button.
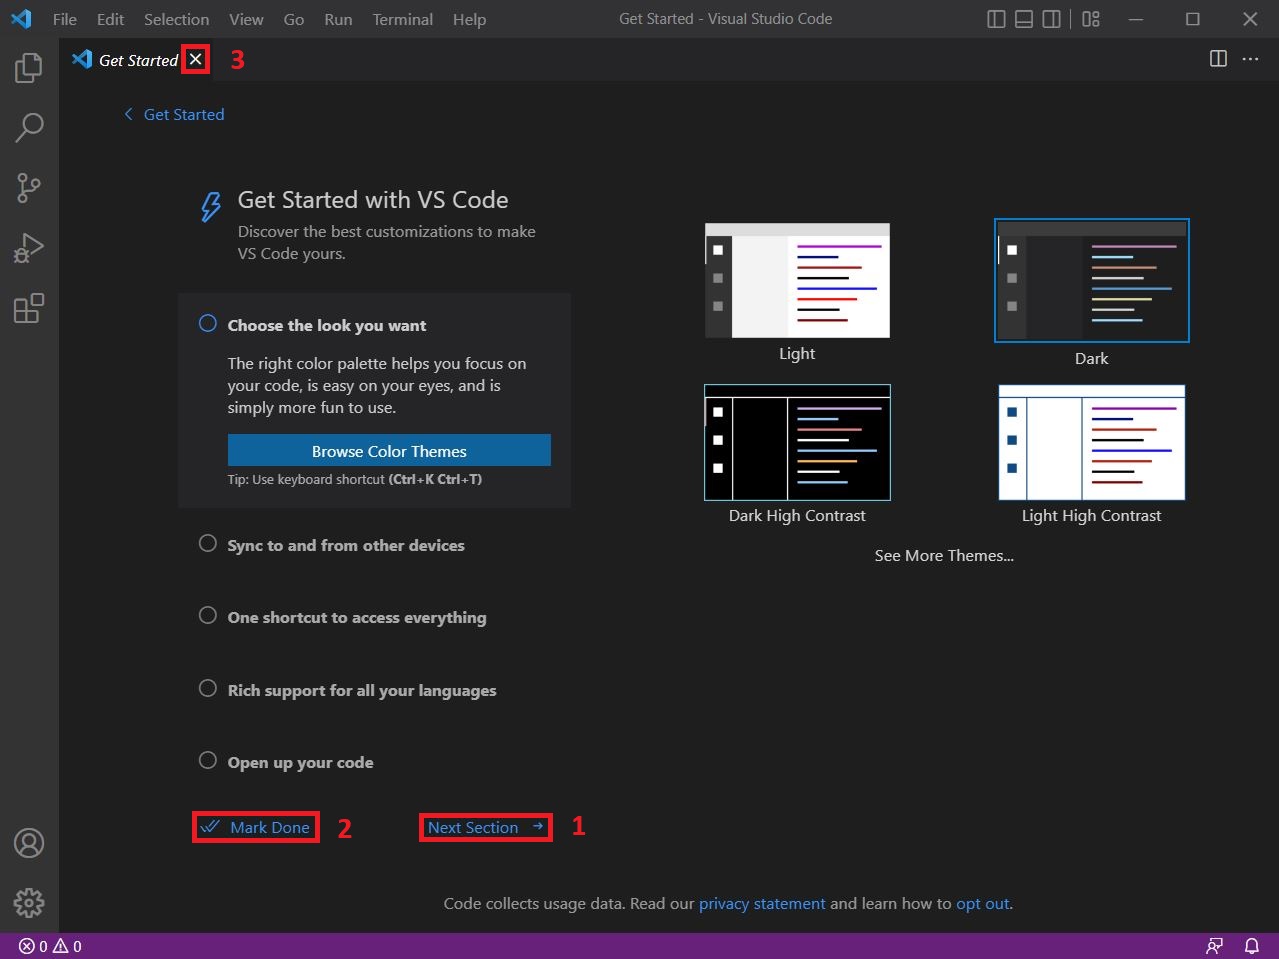
Installation finished and VSC started. Now you might:
1. Follow the 'Get Started' wizard to get introduced, to apply some basic configuration (such as a color scheme) and/or to install additional tools (such as Git). 2. Mark the Wizard as 'Done' and ... .
3. ... close the Wizard.
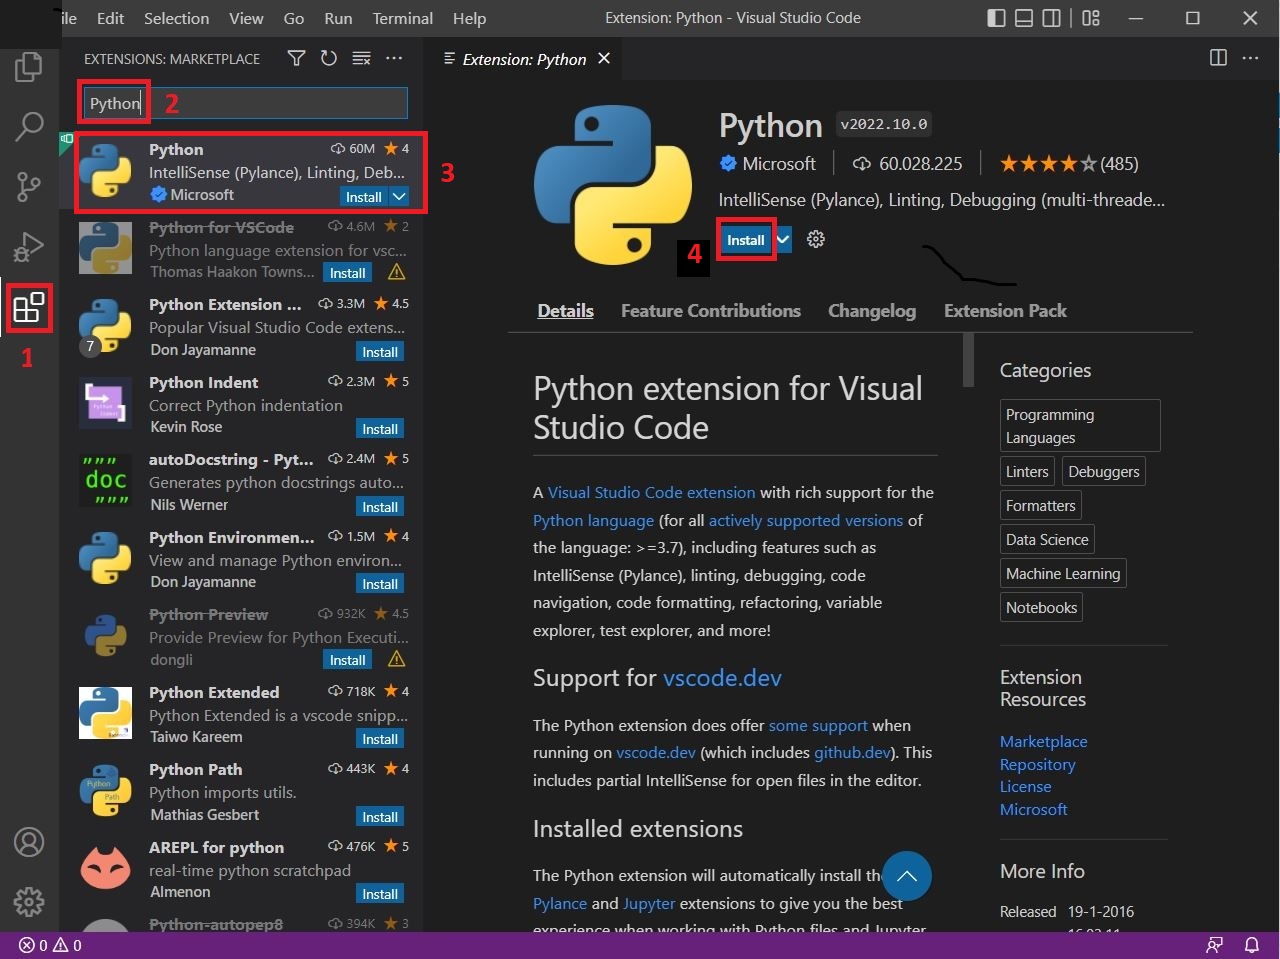
Since we may write test automation code in Python, let’s first install the Python extension (click an image to enlarge):
1. Activate the Extensions pane.
2. Type 'Python' into the search bar.
3. Select the MS Python extension.
4. Click the 'Install' button.
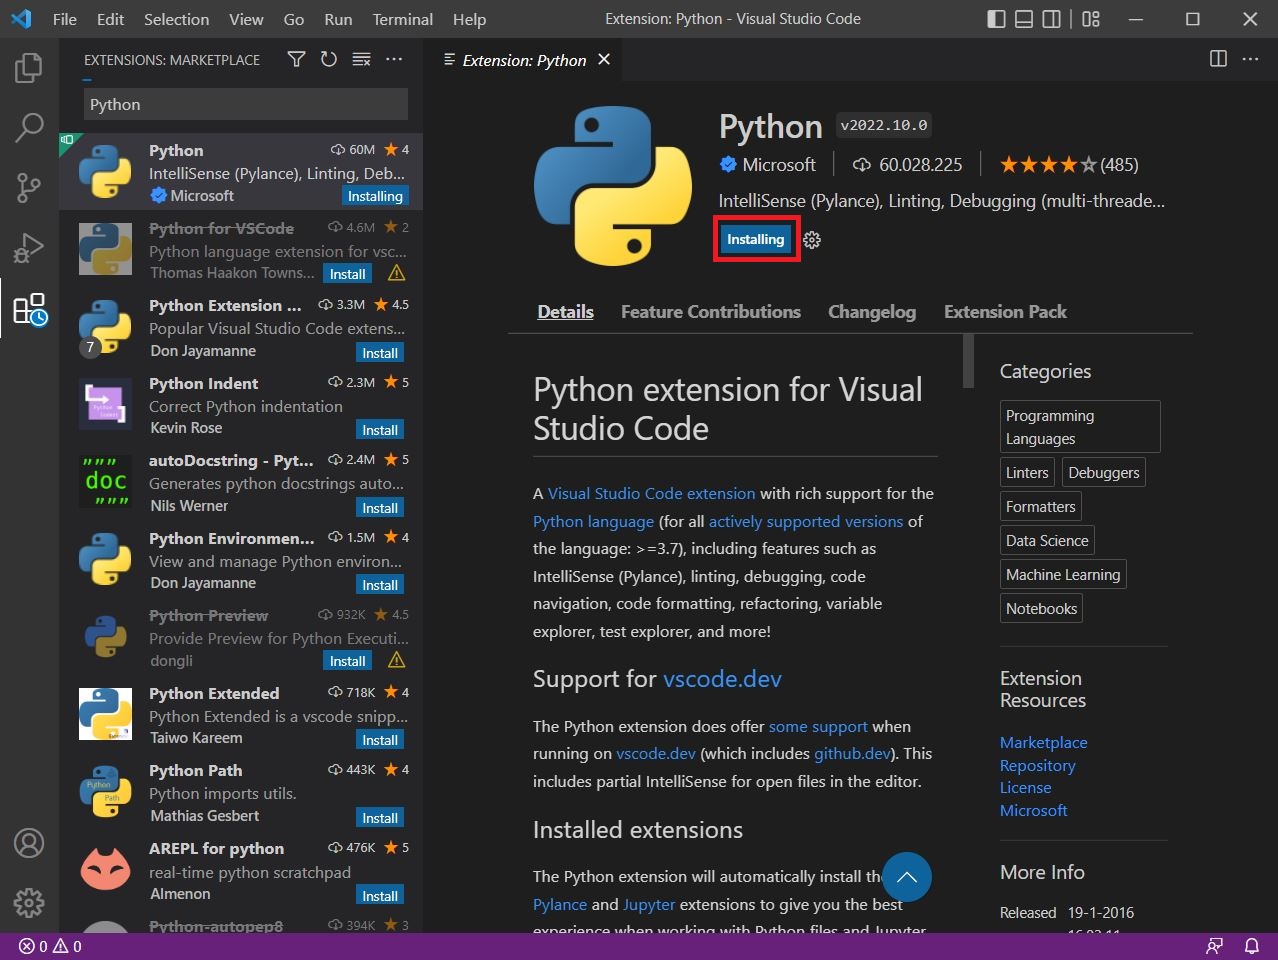
The extension will be installed.
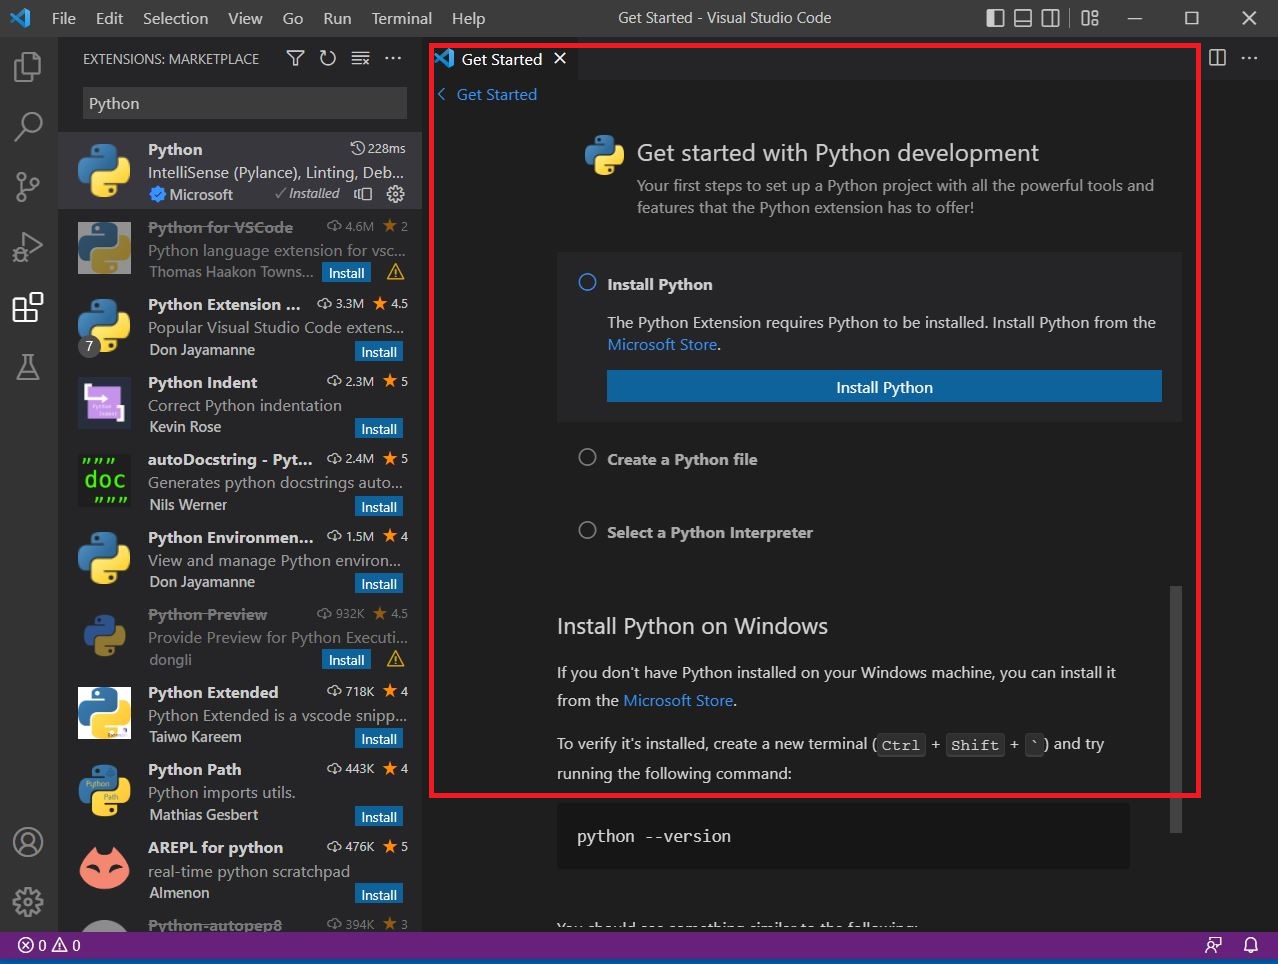
Installation finished. Note that we do not need to install Python, since we have done that already.
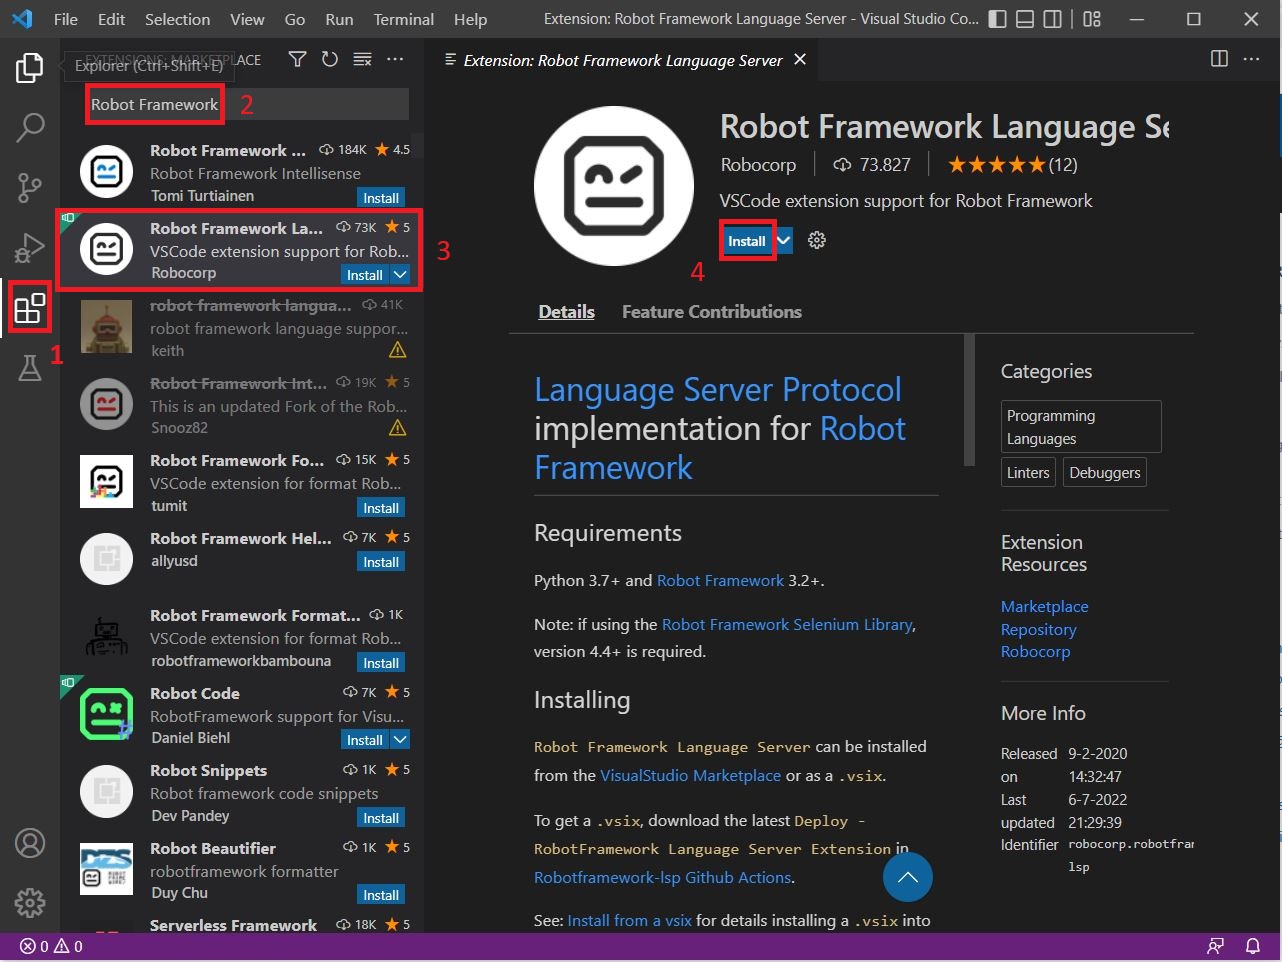
Now, let’s install the Robot Framework extension in the same fashion (click an image to enlarge):
1. Make sure the Extensions pane is active.
2. Type 'Robot Framework' into the search bar.
3. Select the RF Language Server extension by 'RoboCorp'.
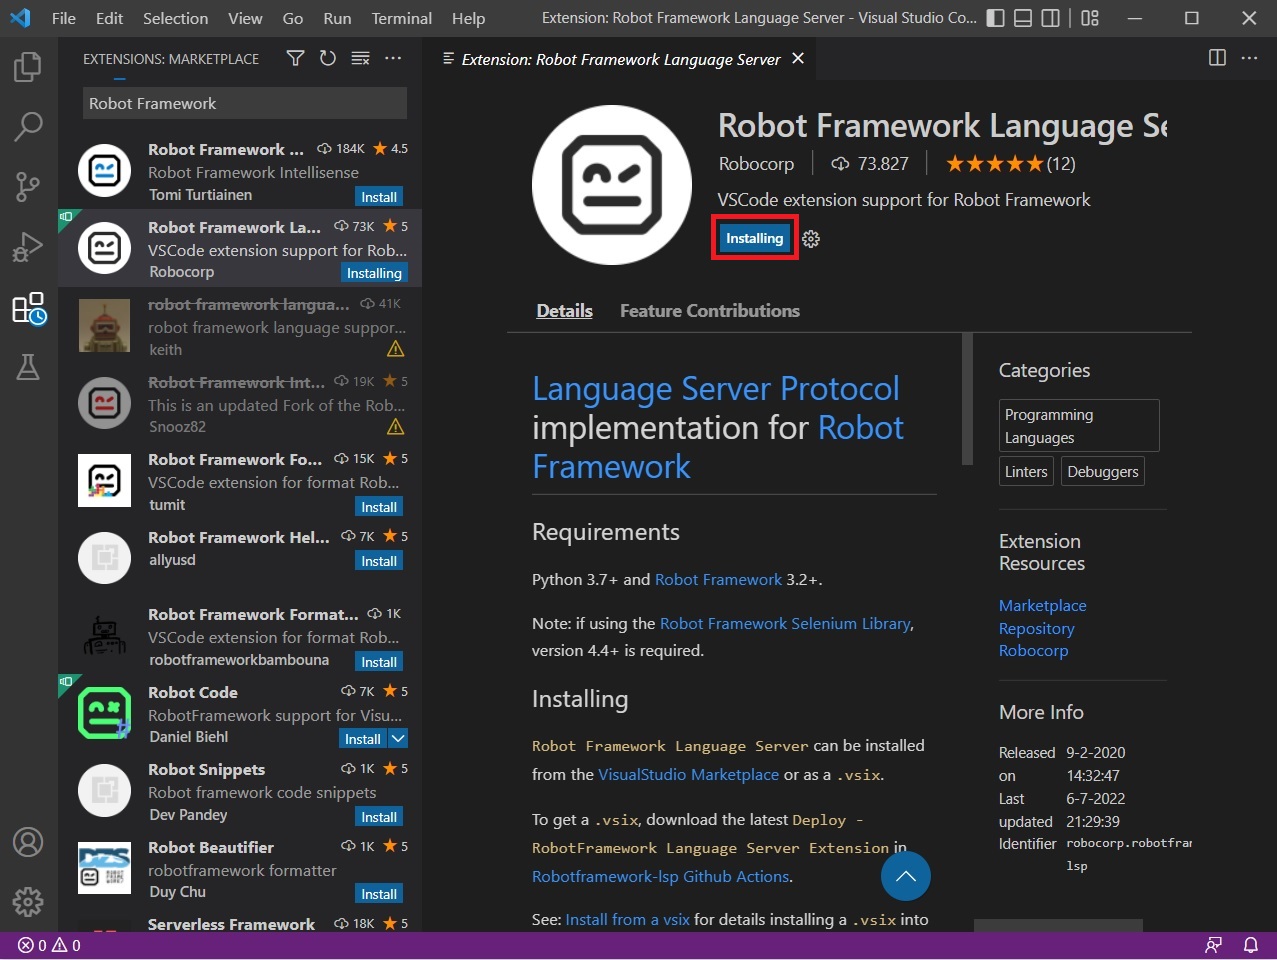
4. Click the 'Install' button.
Now let’s see whether the MS Python language server will properly assist us when we code in Python.
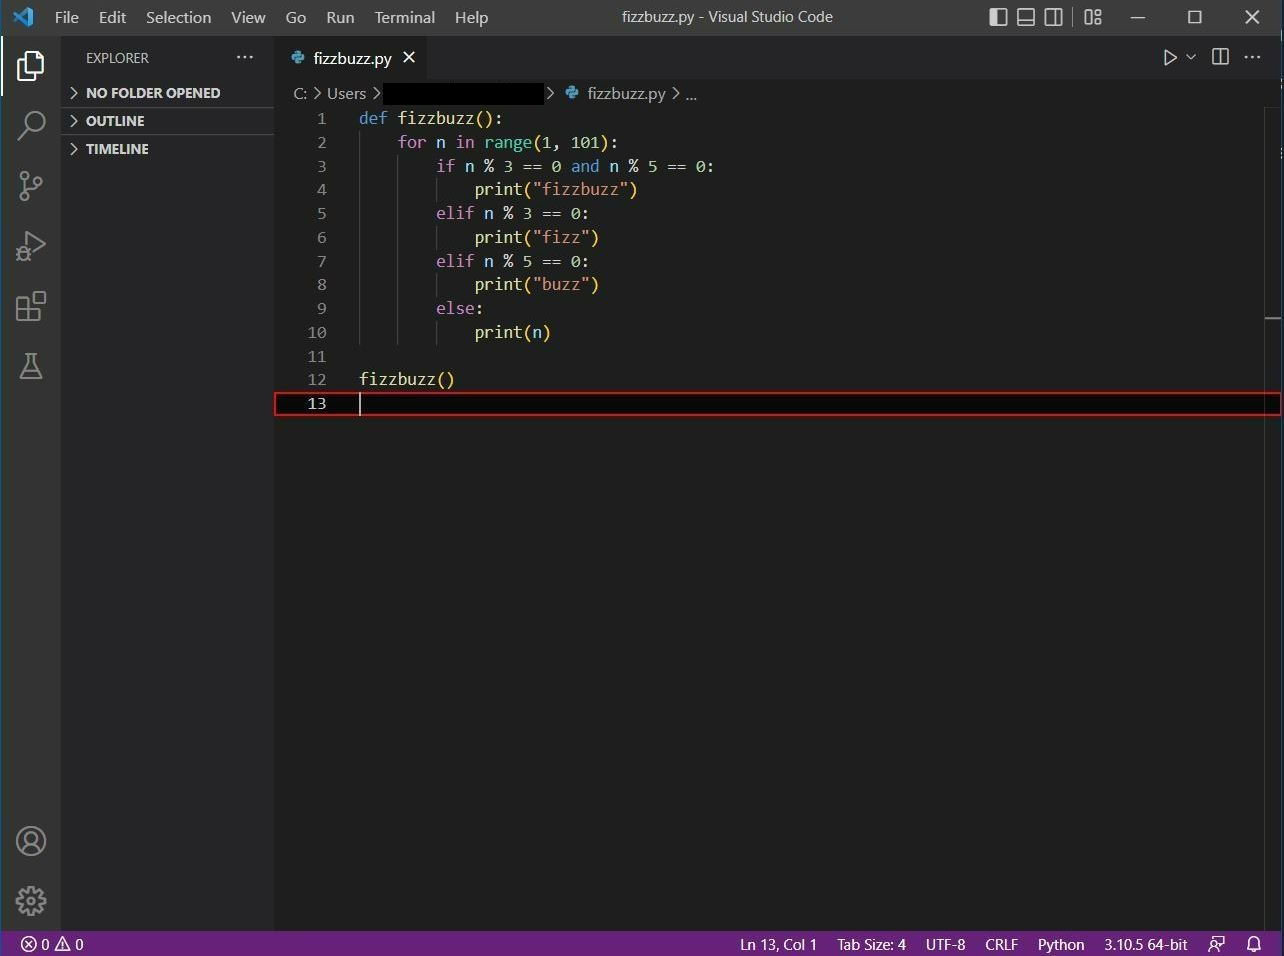
To this end, we’ll use the well-known fizzbuzz exercise. If you click on the first image, the Python file with the code will download.
The contents of our Python example file.
(Click the image to download the Python code/file.)
We can immediately see the syntax coloring as provided by the Python-LS.
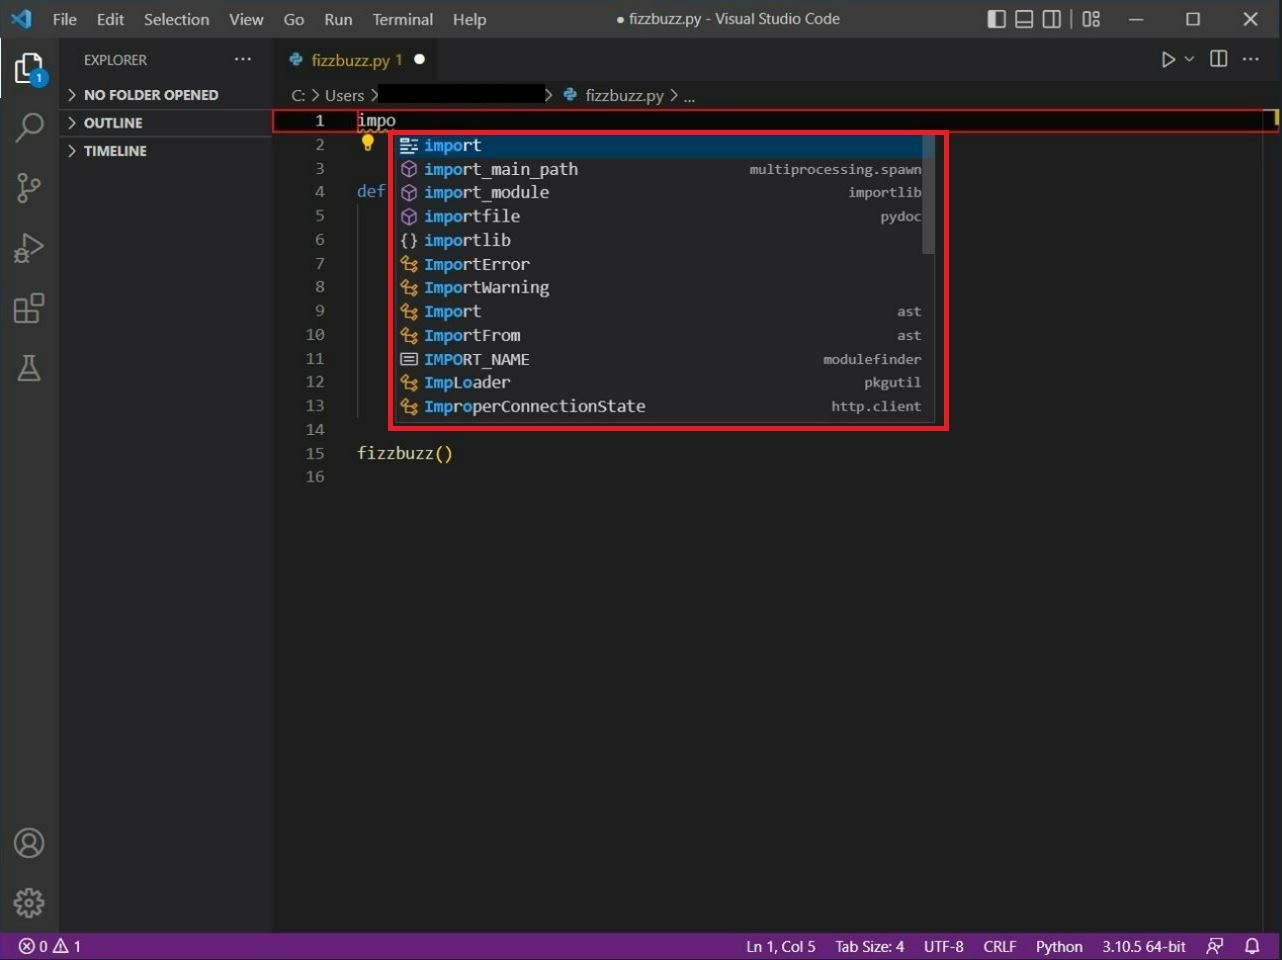
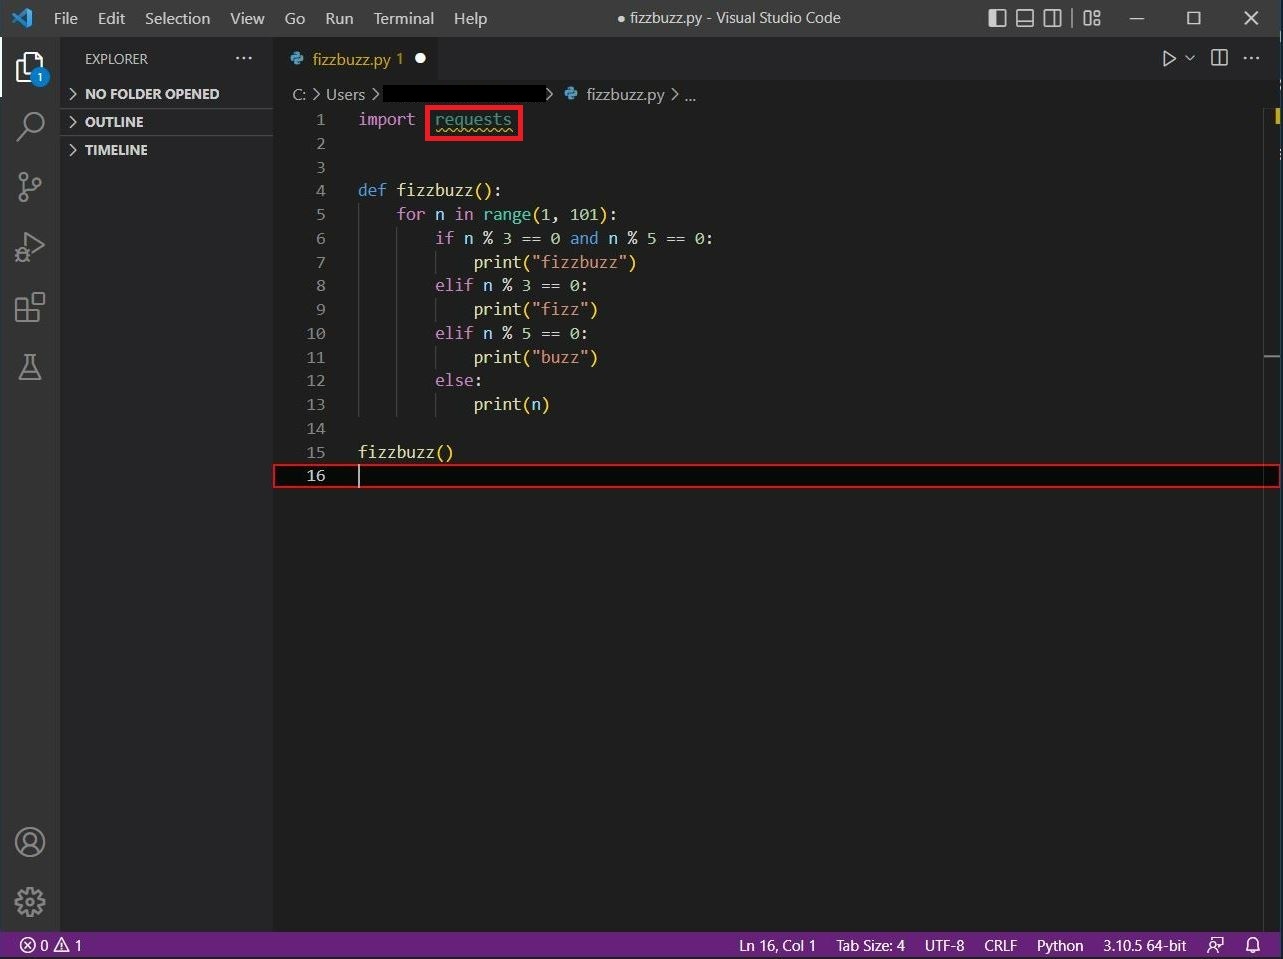
Let's try the code-completion feature, for instance by importing some random module.
As soon as we start to type on line 1, auto-complete kicks into action.
We choose the 'import' keyword and then try to import the requests module.
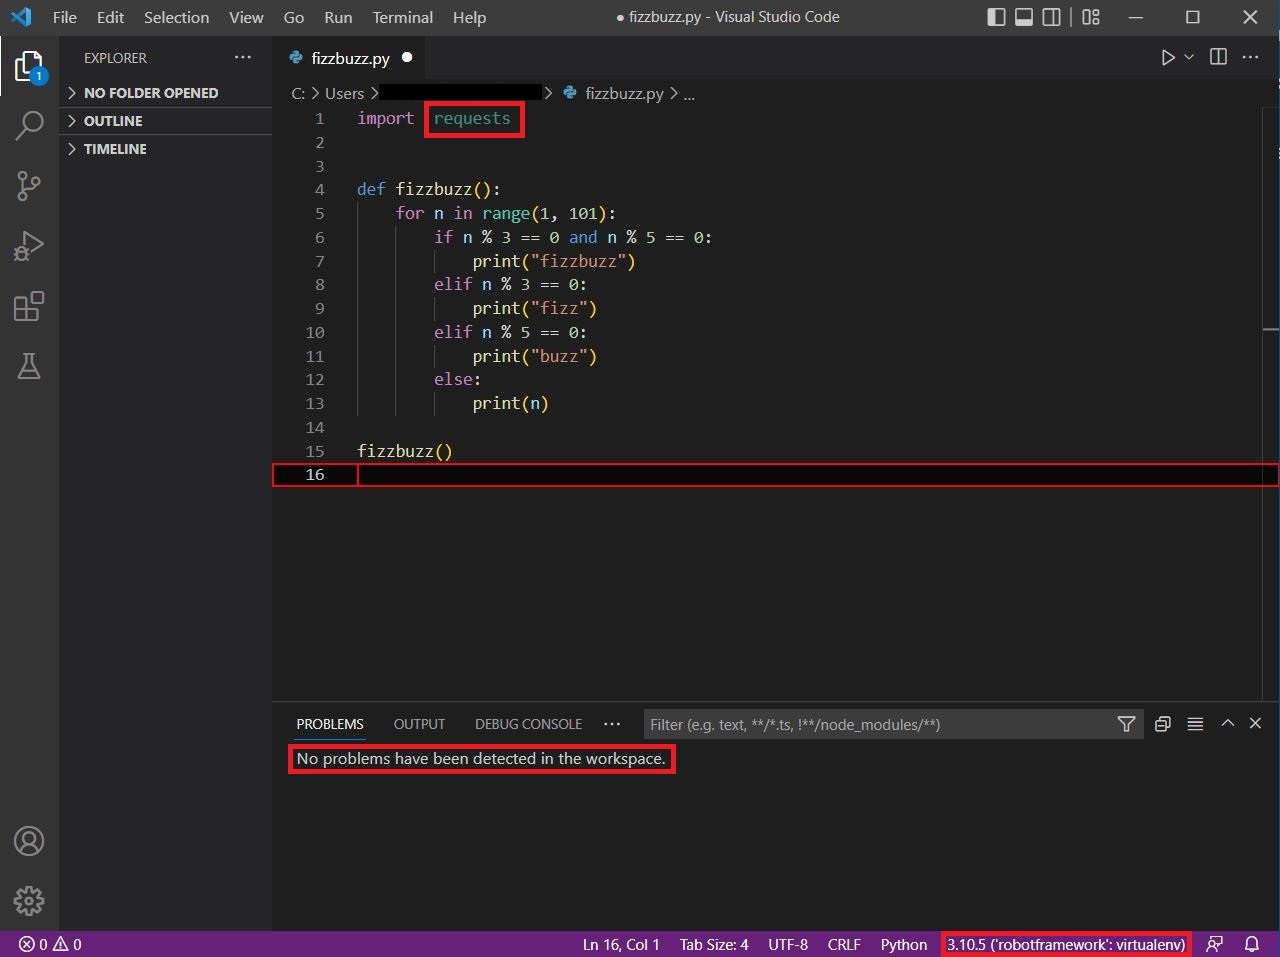
However, as we can see, something is wrong: 'requests' is marked by the LS with a squiggly line. This is an example of code analysis and validation.
But what exactly is the matter?
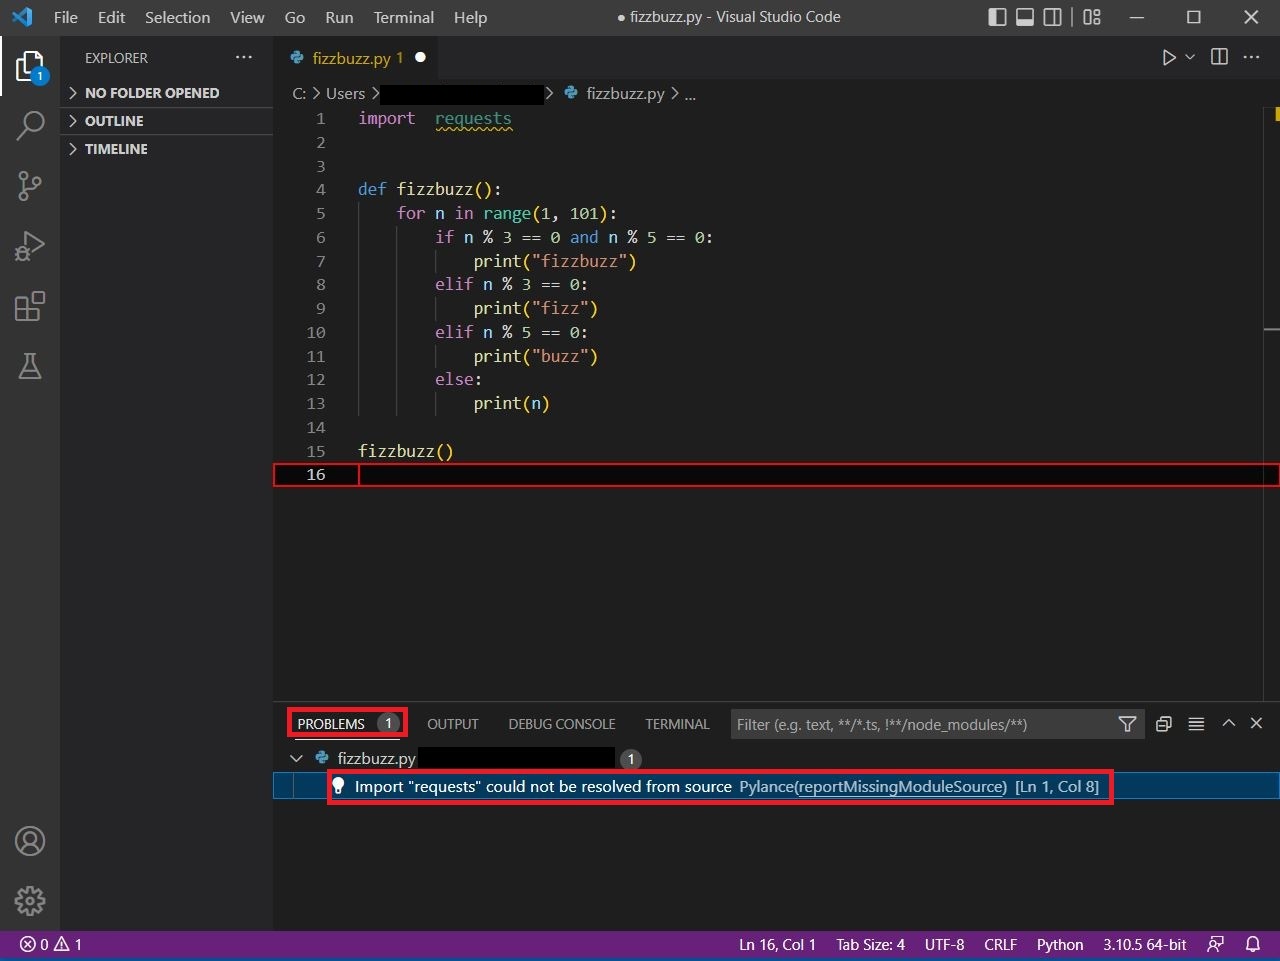
To find out, we can do several things. For instance, start the VSC terminal through menu [Terminal -> New Terminal] or through keystroke [Ctrl + `].
If we activate the 'Problems' tab, we get an indication of what is wrong with our Python code. Apparently a module named 'requests' cannot be found.
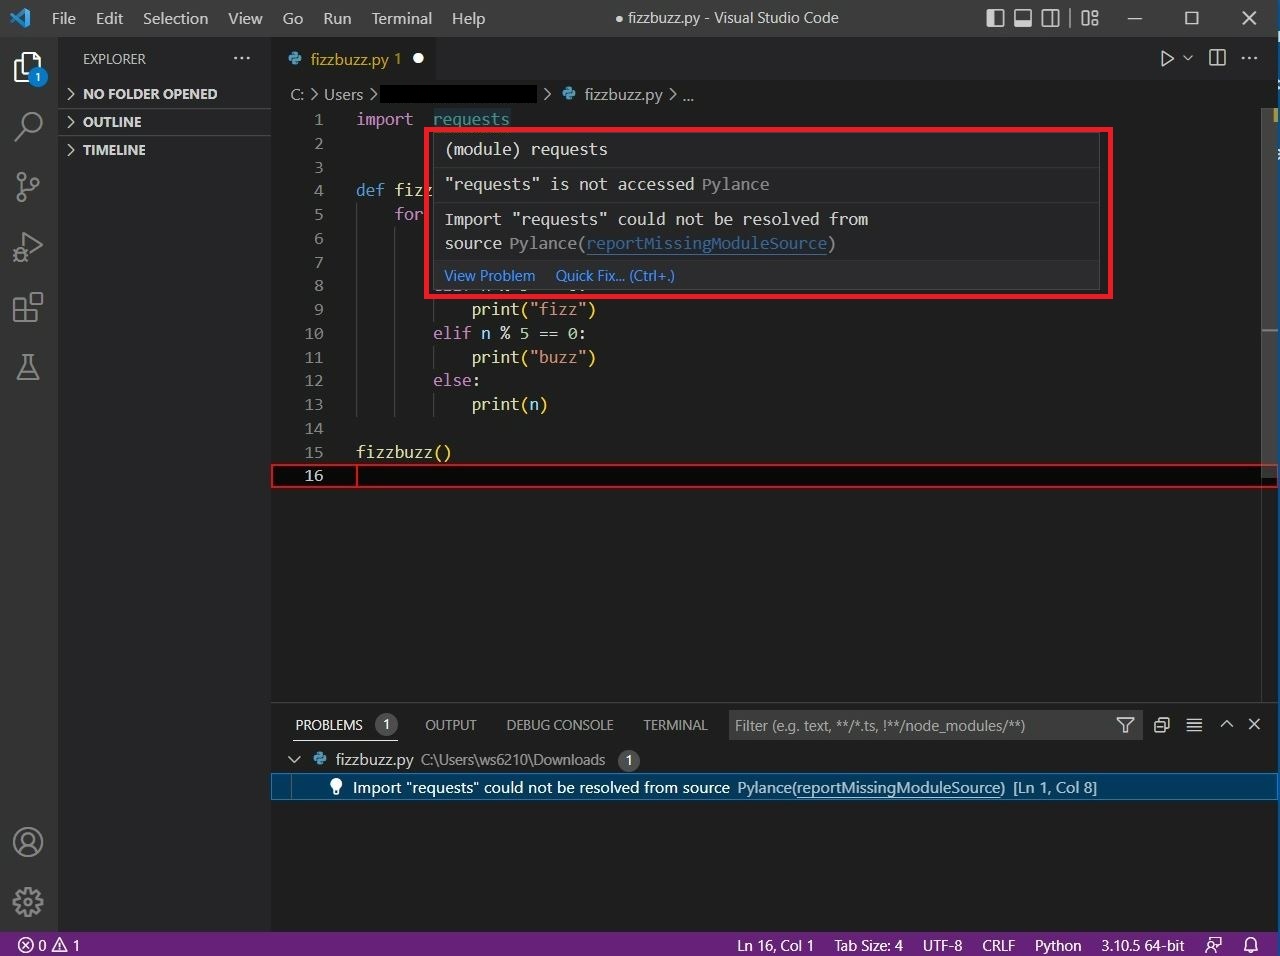
Another method of getting more information on the error at hand is by hovering over the offending code.
If we do so, a dialog will appear with information as to the root cause of the problem and some hints on how to possibly solve it.
As we can see, the information is similar to that of the terminal output.
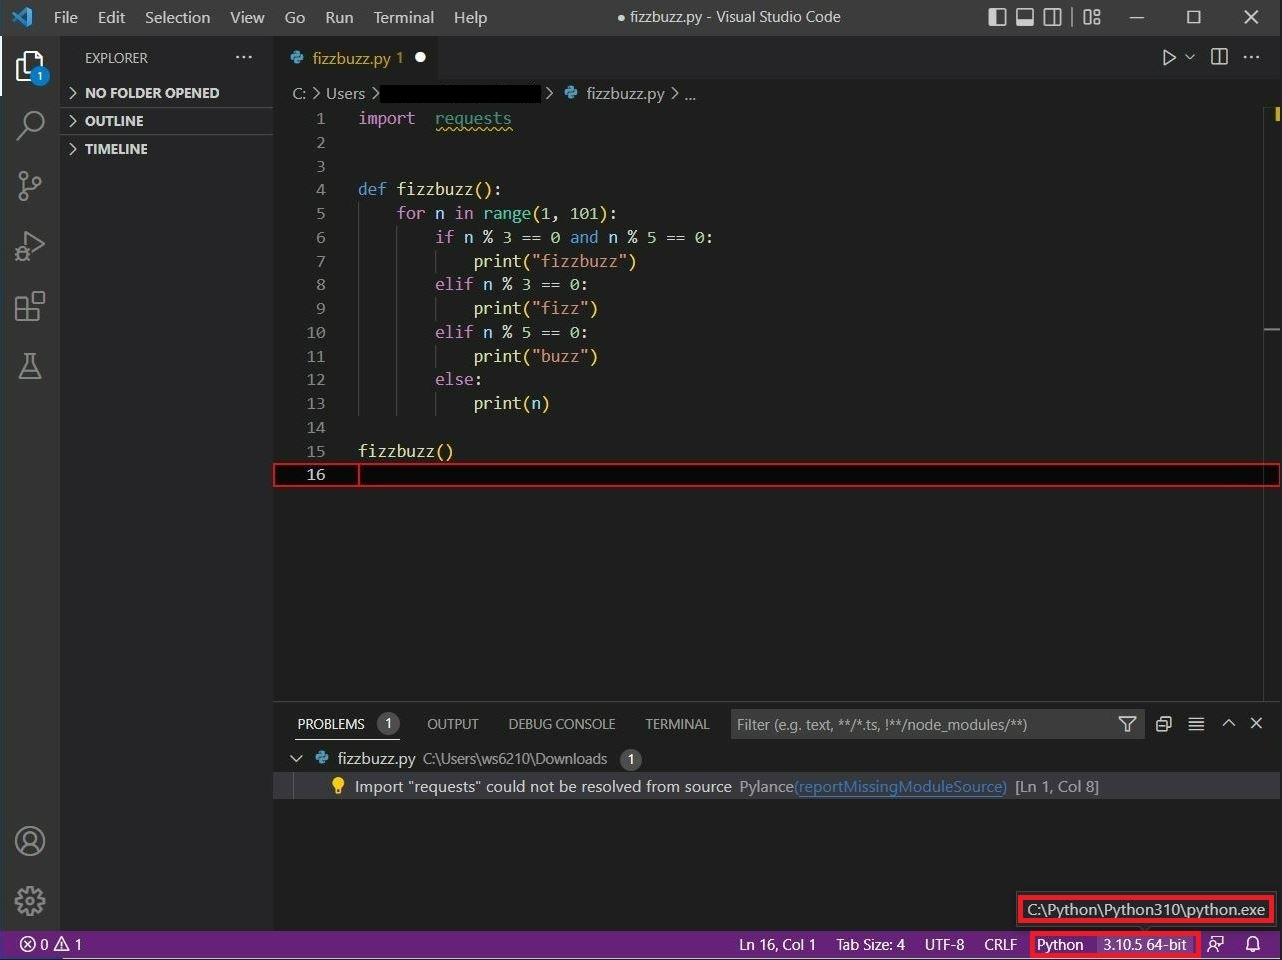
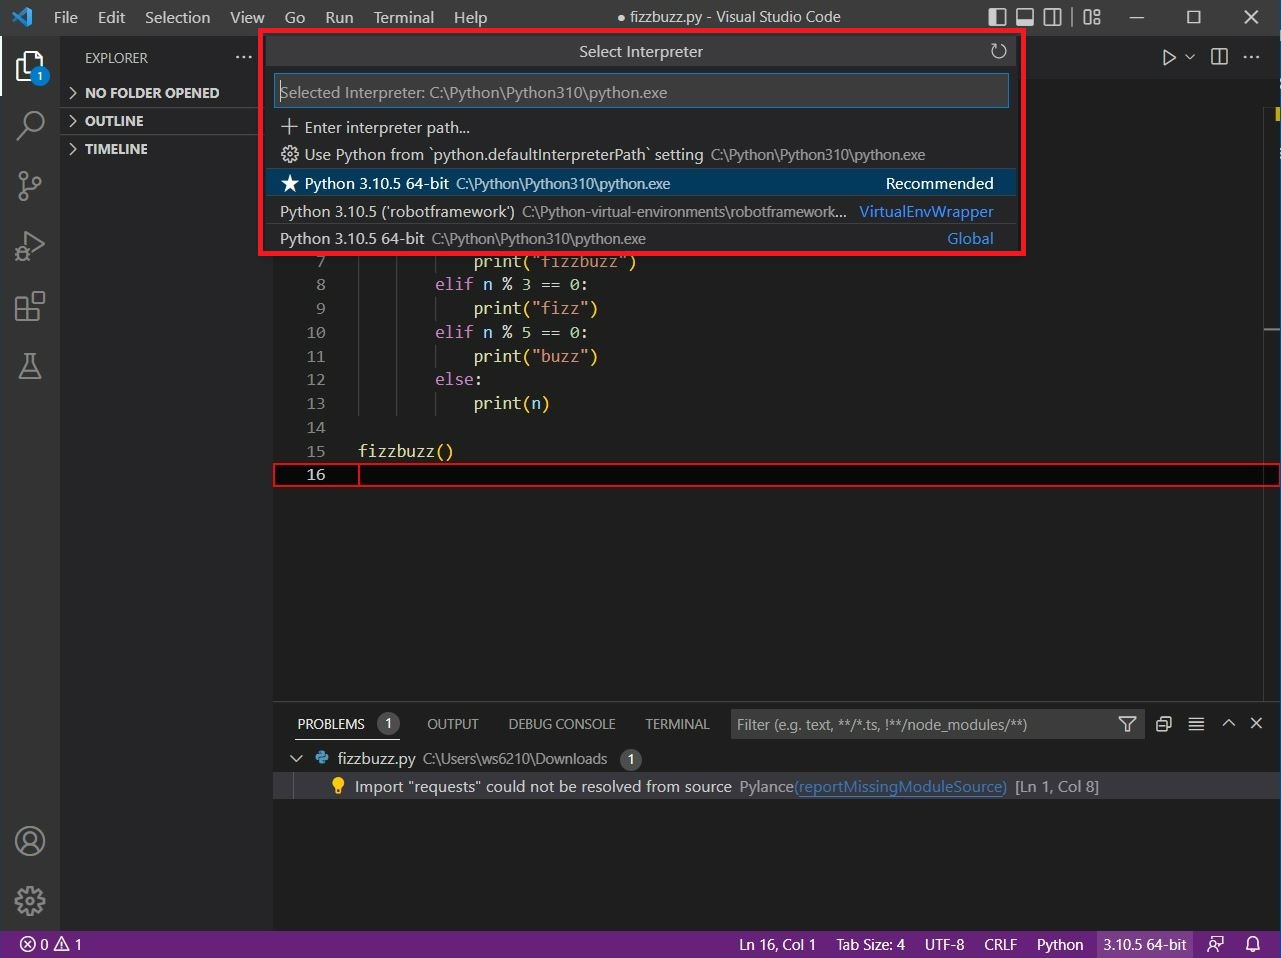
Or course, sooner or later we'll figure out what the underlying issue is, namely that the wrong Python interpreter is bound to the Python-LS.
As can be gathered from the VSC status bar, currently the global Python installation is being used. However, we installed all of our packages into a virtual Python environment!
So, naturally, the requests module cannot be found, since it is available only within the context of the virtual env.
Thus, we'll have to bind the correct Python interpreter to the Python-LS.
One way of doing this within VSC is by clicking on the current interpreter in the status bar. This will produce a list of known, available interpreters (global and/or virtual). Just like in the status bar, we can see here which interpreter is currently selected.
We can simply click on the desired interpreter to select it. So, let's activate our virtual Python environment and see what happens!
Well, the problem has been resolved! We can now import requests and start to use all it has to offer.
We have to perform some basic configuration to get the RF Language Server extension to function properly.
Please note that here we will only apply the most basic of settings. In the follow-up posts we will look at the many other configuration options that the RF Language Server extension provides.
For now, just follow these few steps (click an image to enlarge):
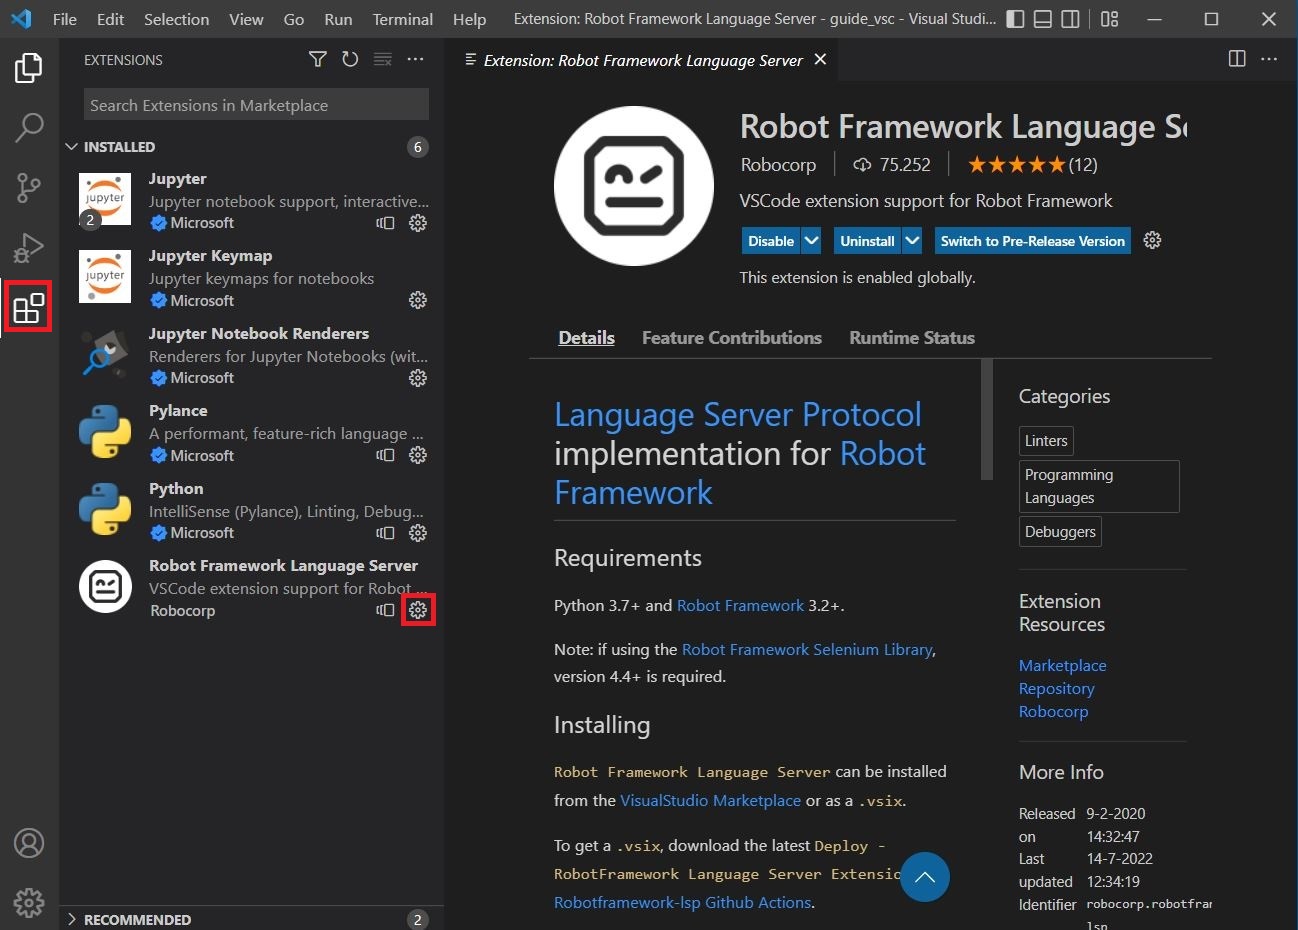
Make sure the Extensions pane is active and click the gear-icon of the RF-LS extension control.
Select the 'Extension Settings' menu-item.
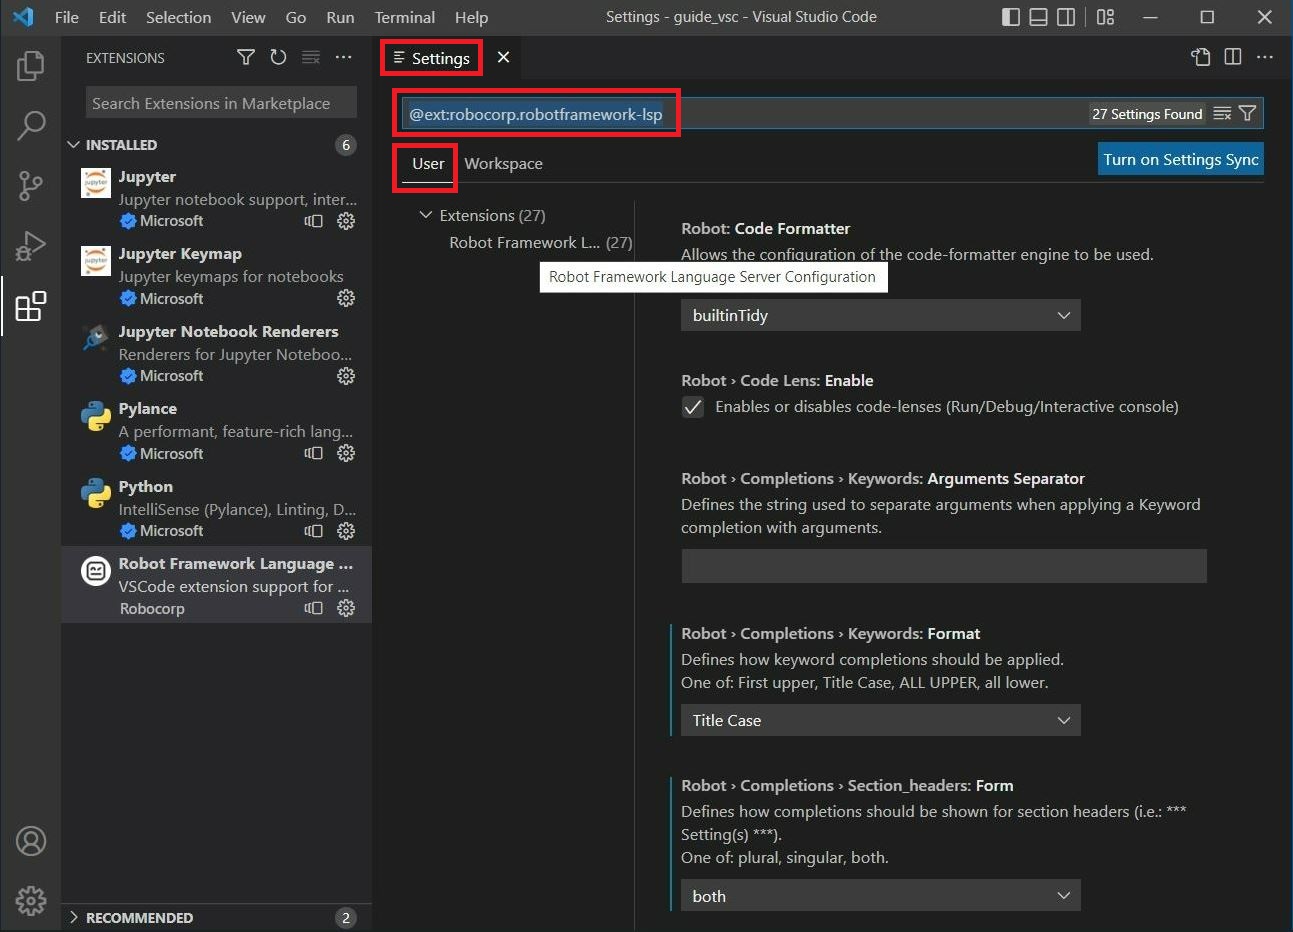
The previous step opens the RF-LS configuration pane.
Make sure to activate the 'User' settings!
(We'll go into the difference between 'User' and 'Workspace' in the next article.)
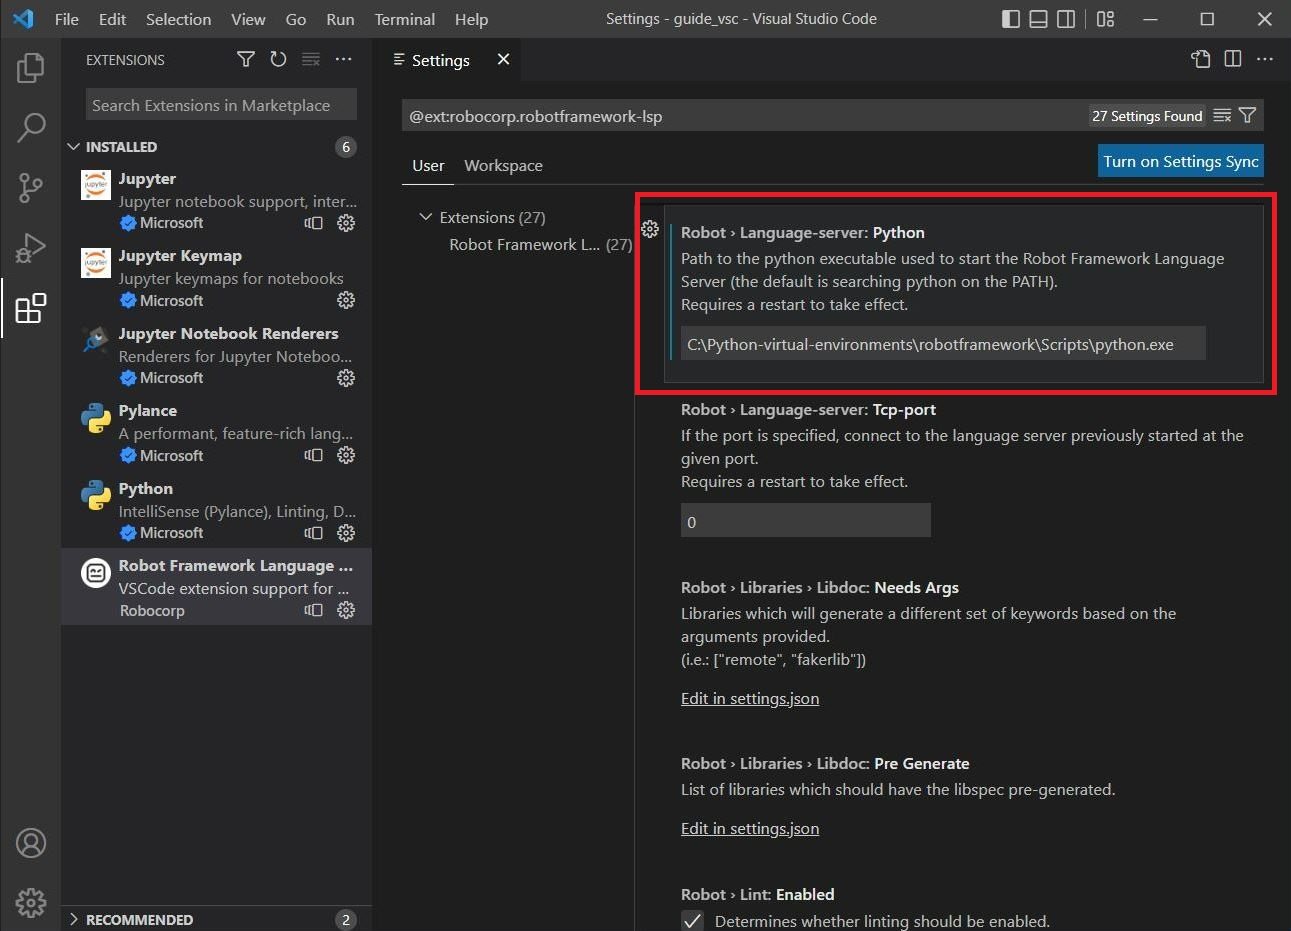
Scroll down to the 'Robot > Language-server: Python' setting and enter the path to the python.exe of the virtual Python environment that we created earlier.
This will make sure that the language server will run within the context of our virtual Python environment. There is no reason to use another Python instance than the one that we will also employ for coding and running our RF tests (see the next step).
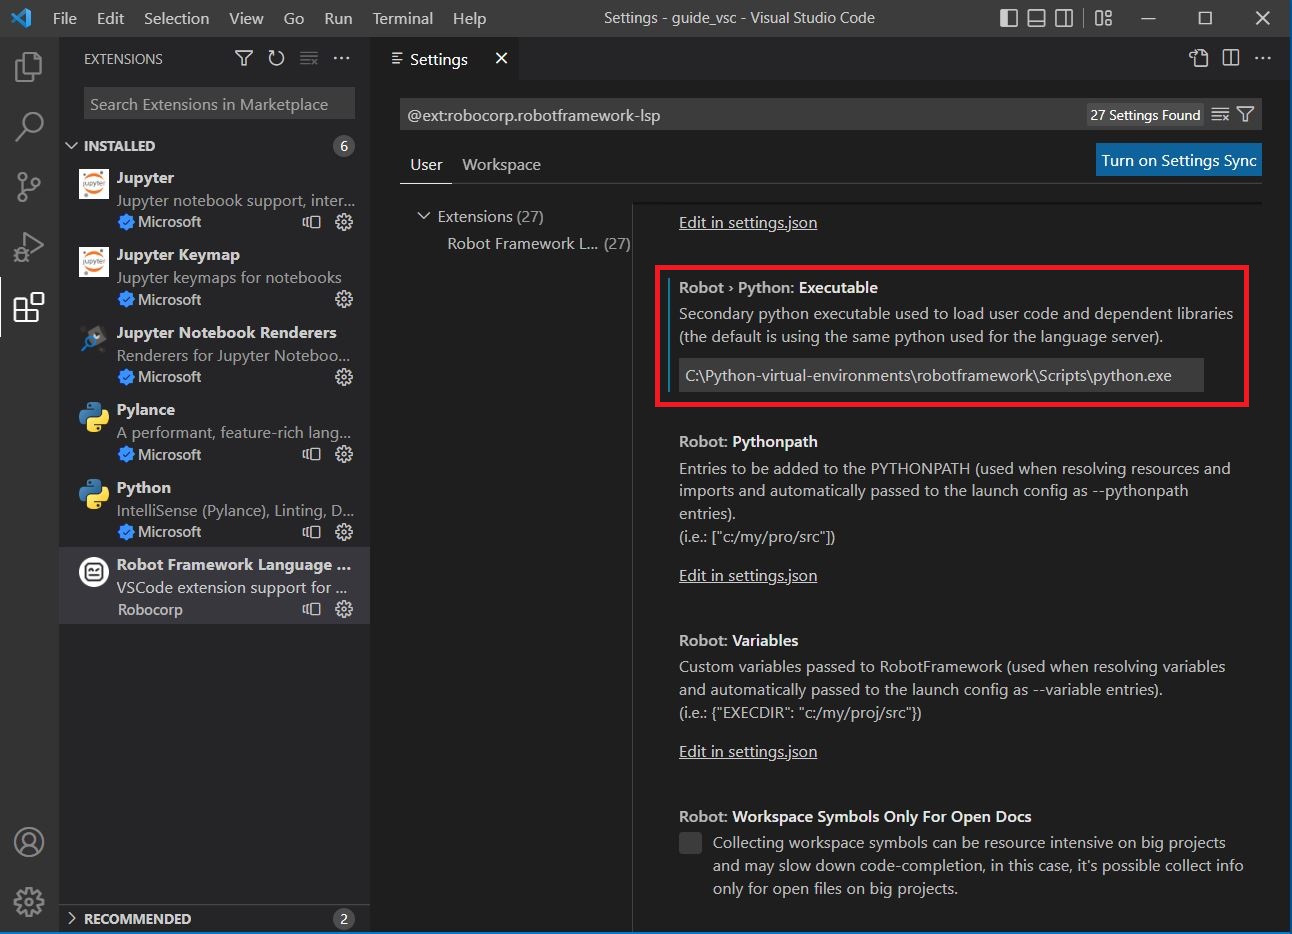
Scroll further down to the 'Robot > Python: Executable' setting.
Through this option we can make sure that when we (1) code tests and when we (2) run them (from within VSC) through the relevant facilities of the RF-LS extension, we will then employ the automation stack as installed within the designated virtual Python environment.
Since we have assigned the correct environment to the language server itself (in the previous step), you may also leave this field empty.
Let’s do a quick check to see whether the installed development stack functions properly. As follows (click an image to enlarge):
1. Make sure the File Explorer pane is active.
2. Press [Ctrl + n] (or use the File menu) to create a new file. This will open a new, plain text file.
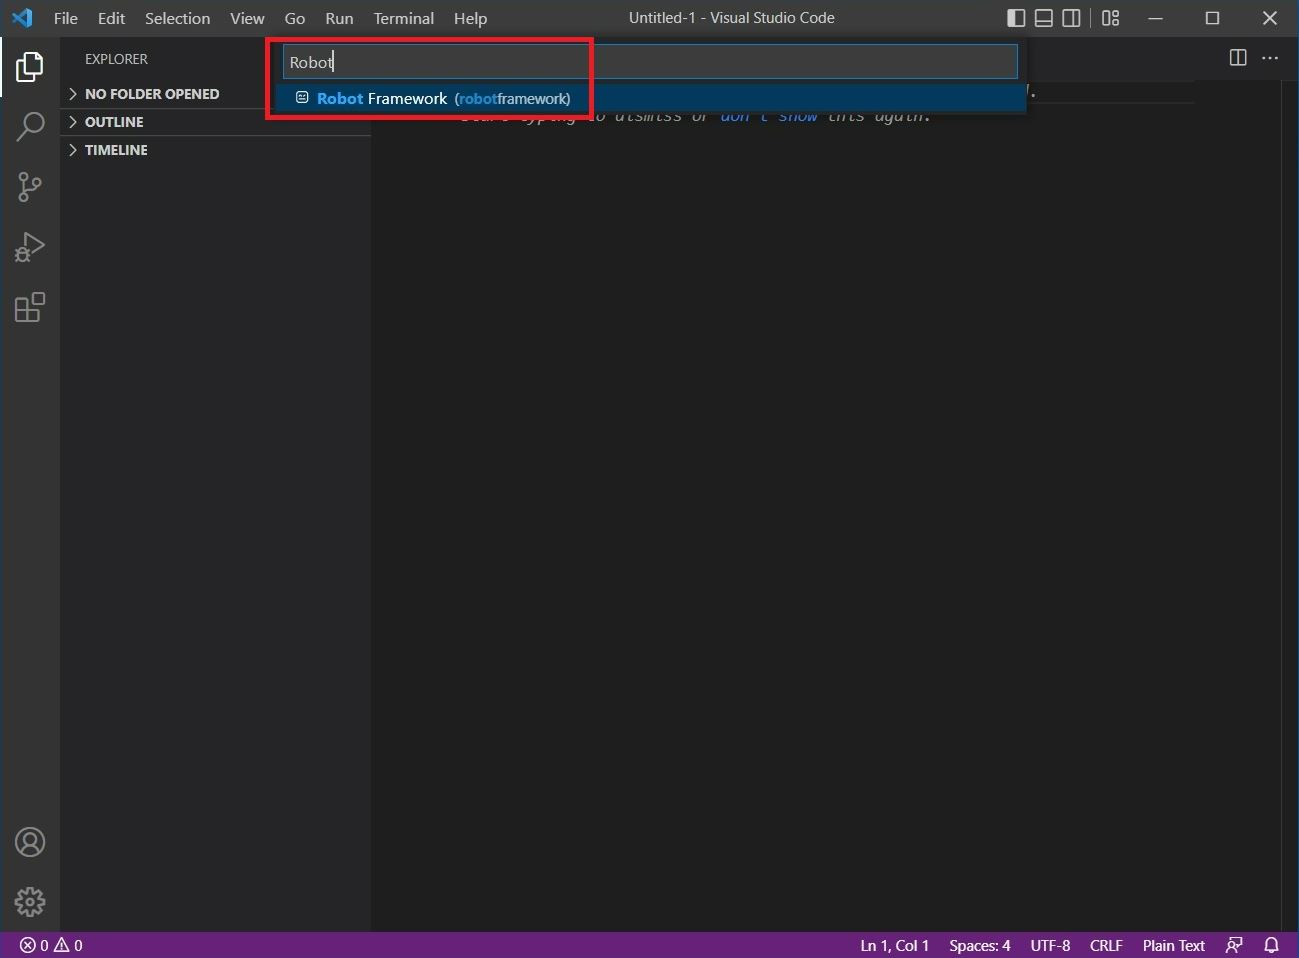
3. Press [Ctrl + k, m] to open the 'Select Language Mode'. Alternatively, you could click 'Select a language' as seen on line 1 of the text file. Or you might click on 'Plain Text' on the right side of the VSC status bar (see the red square in the screen shot).
Type 'Robot' into the 'Select Language Mode' search bar and subsequently click the 'Robot Framework (robotframework)' item.
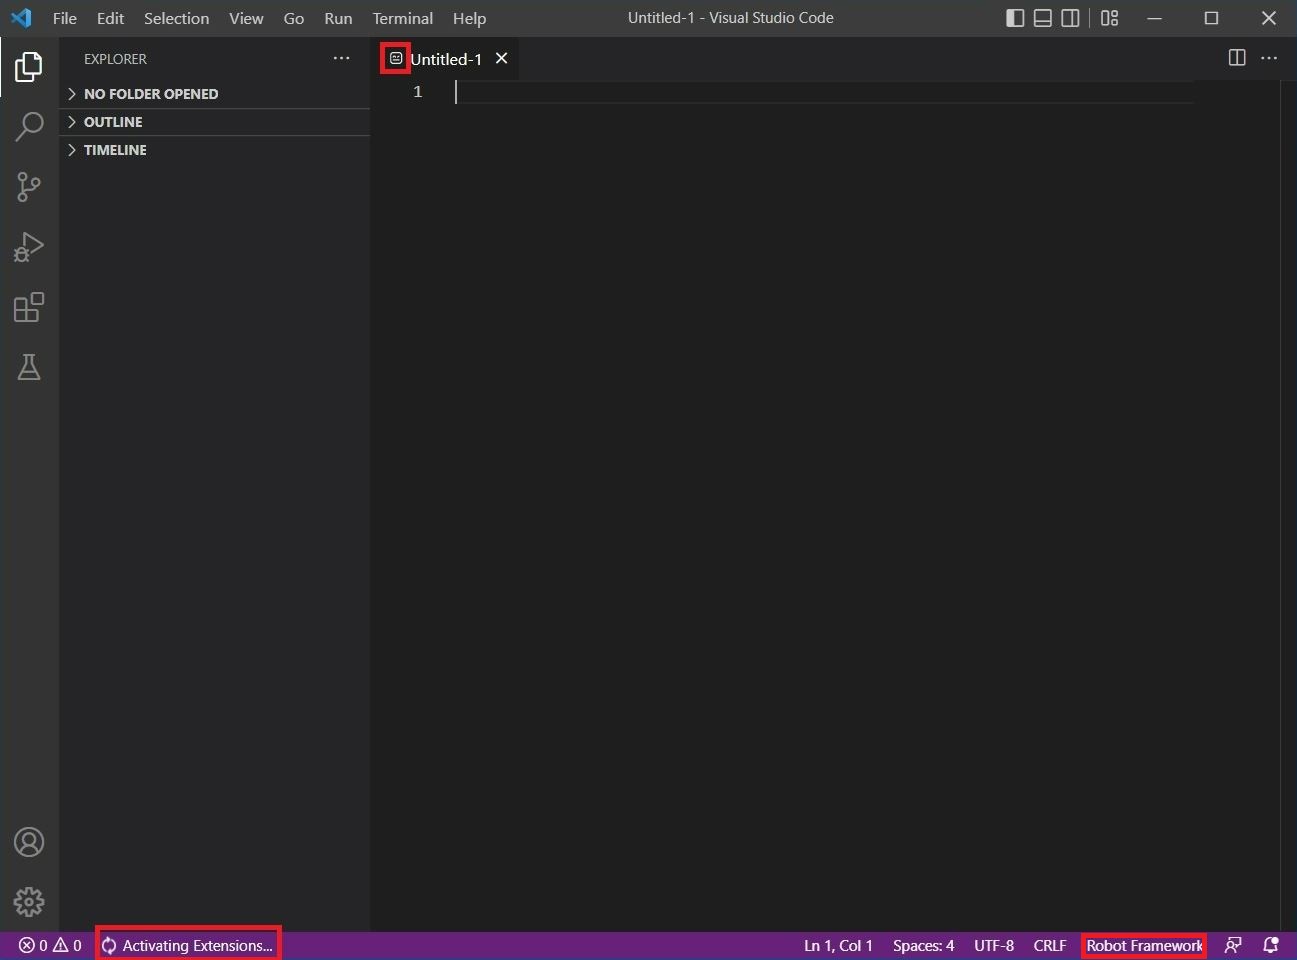
For a second or so, you'll see Activating Extensions ... appearing on the left side part of the status bar.
Afterwards you'll notice that the file type icon has changed into our friendly neighborhood robot.
Moreover, on the right side of the status bar, 'Plain Text' has been exchanged for 'Robot Framework'.
With that behind us, let’s try some simple Robot Framework development to complete our little test! To that purpose, let’s first save our file (using [Ctrl + s]) and then write and run a very simple demo test case.
Even in this simple demo case we can see several RF-LS services in action, such as syntax highlighting/coloring, syntax analysis & validation and code completion.
Also note that upon saving the file, it’s extension had been correctly (and ‘automagically’) set to .robot. Similarly, where we to open a .robot (or .resource) file in the File Explorer, the RF-LS extension would also be activated for the code in that file.
However, there are a lot of very interesting configuration options that may boost our productivity.
These options pertain to the Robot Framework Language Server extension as well as to Visual Studio Code itself.
In the next couple of posts we will therefore take a look at some of these options, so as to understand their purpose, their inner working and how to optimize our development environment (and productivity) through them.
So please stay tuned for the next part!
Comments
Please join the discussion: place a comment on this page.
The comment will be immediately visible in this comment section.
Please note a Github account is required to comment.


Comments
Please join the discussion: place a comment on this page.
The comment will be immediately visible in this comment section.
Please note a Github account is required to comment.