CLOSE
Python virtualenvironments virtualenv testautomation testframeworks robotframework I consider it good practice to reflect on a new technique, pattern or (in this case) tool, before actually using it. There are several benefits in doing so.
For one, we will be better equipped to understand, interpret, analyze and remove errors or other problems that we might encounter, when we understand the inner machinations of what we’re working with. We will also utilize our tool (or pattern, etc.) both more efficiently and effectively when we know which problem(s) it has been designed to solve and know how it solves this (these) problem(s). We will then also utilize its potential to a greater extent, because we know what it has to offer.
Apart from such practical benefits, I believe that as testers we should have a natural curiosity. A curiosity that drives us into investigating how stuff works and why it works that way.
Let’s therefore first have a closer look at virtual environments, before putting them to use:
Note that this is just a first, quick peek under the hood: we will keep on peeking even in the remaining parts of this series of articles, where we will be working with virtual environments.
A virtual environment is a self-contained, isolated Python installation that (as such) is independent from any global/system Python installations (and their configurations) as well as from any other virtual Python environments (and their configurations). Within such an environment, we can create an ecosystem of third party libraries/packages that will be specific for (and dedicated to) that environment.[1]
Installed libraries/packages will only be accessible to the Python interpreter of that specific environment. Vice versa, no packages from outside the environment will be accessible to that interpreter.[2]
Once you have created an environment that fulfills the requirements of your specific development project, you can then proceed and bind the environment to that project. Or to multiple projects that have identical requirements.
Creating a virtual environment generates a (relatively) small directory structure. Depending on the tool (and depending on the parameters you apply when creating the environment) there are some variations within this structure. For instance, this is the folder structure for one of my virtual environments, created with the Python module virtualenv:

But regardless the tool, all virtual environments basically consist of three components:
\Scripts folder (\bin on Unix/Linux). \Lib\site-packages folder; see below) to store scripts and/or executables that are associated with them. pip install robotframeworkpip.exe in the \Scripts folder would be called, which acts as a wrapper for the pip module in \Lib\site-packages. The same goes for the script ride.py, which is called when you start RIDE (Robot Framework Integrated Development Environment) from the command line and which, in turn, acts as an entry point to the RIDE package in the \Lib\site-packages folder. \Scripts folder of my virtual environment: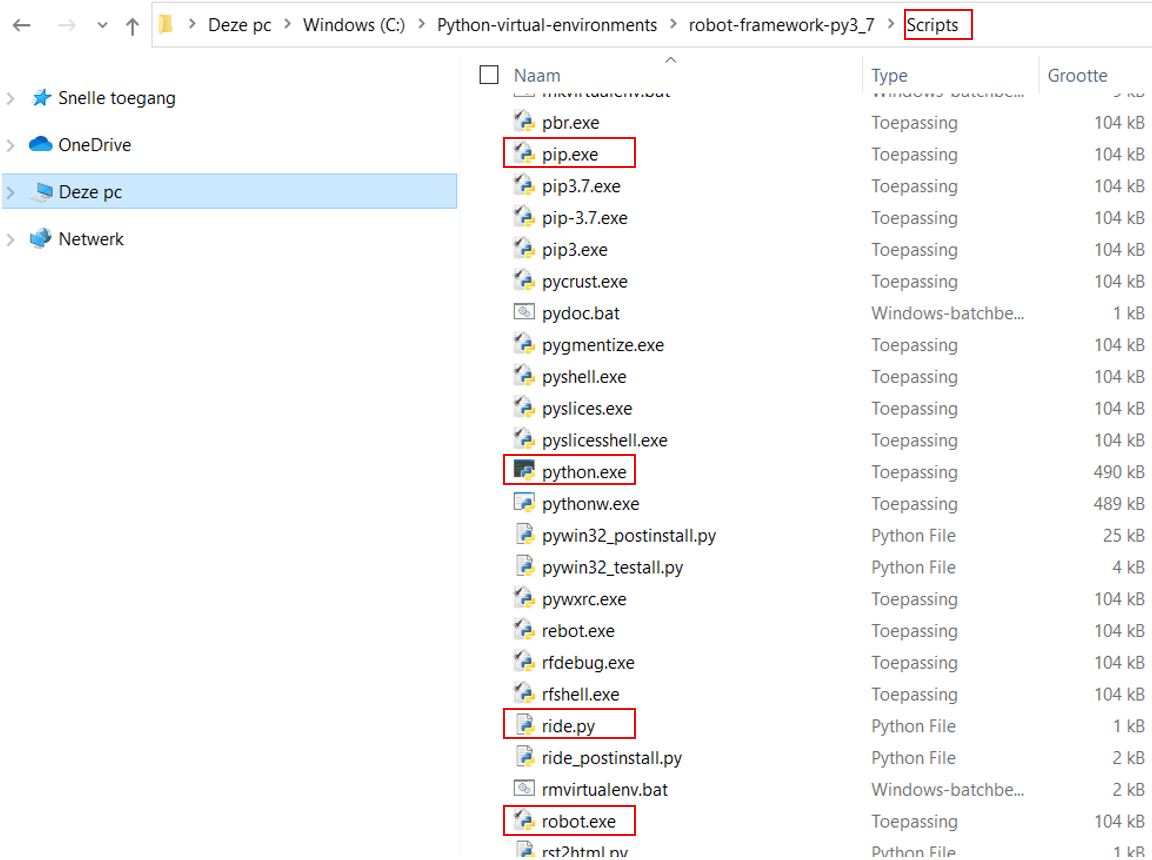
\Lib\site-packages folder. 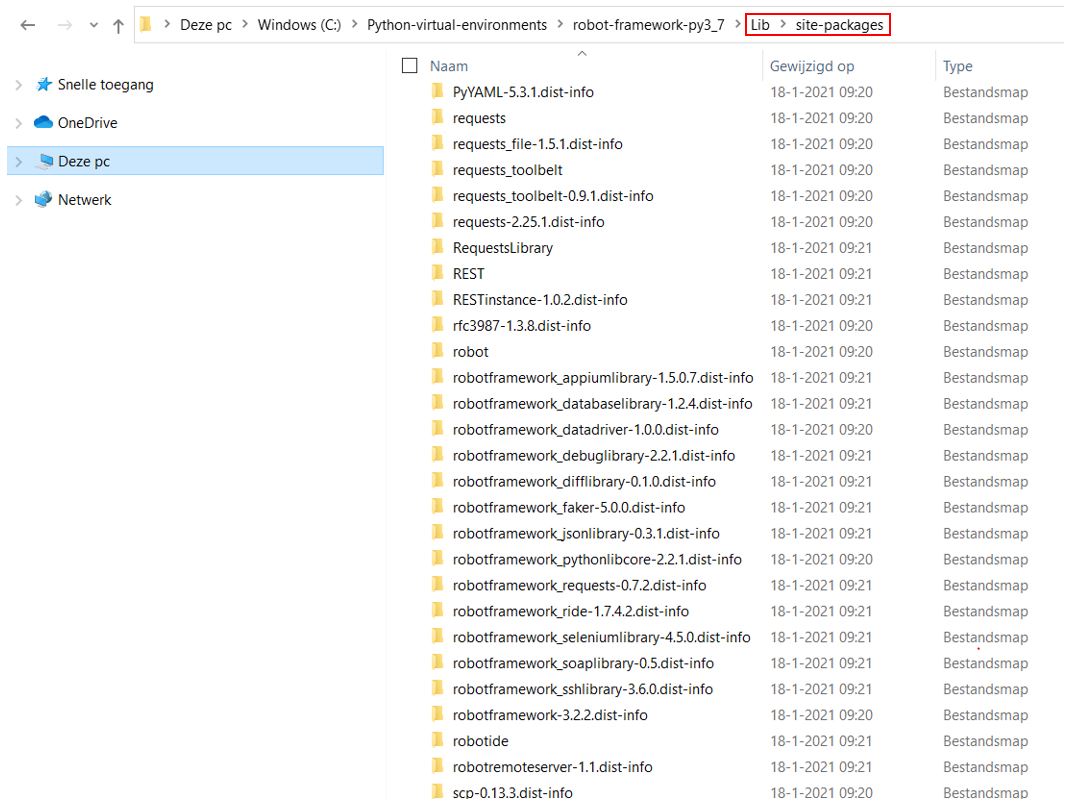
So the three basic types of artifacts, that every virtual Python environment is composed of, are:
The scripts/executables and the packages are closely related, as was just explained.
These three basic components are, as an independent whole, isolated from any other (virtual or system) Python installation.
Creating a virtual Python environment for your test automation project (and for any kind of development project, for that matter) can be beneficial for many reasons. Among those reasons are:
\Lib\site-packages and \Scripts folders when installing third-party libraries and tools for your various projects. Usually an average project will require quite a few packages to be installed. Consequently, the mentioned folders will fill up fast and become rather hulking and unwieldy.Now that we have some idea of what a virtual environment is, let’s create one in the next part.
[1] Although you can configure your environments to share certain artifacts. (back)
[2] Again, depending on how you rig your environment(s), you could share artifacts between environments. (back)
Comments
Please join the discussion: place a comment on this page.
The comment will be immediately visible in this comment section.
Please note a Github account is required to comment.